Page 7 of 8 FirstFirst ... 5678 LastLast
Results 61 to 70 of 76

Thread: Show your 3D printed LF photography related thing

  1. #61

    Re: Show your 3D printed LF photography related thing

    Being of modest financial means, yet having hobby metal and woodworking shops as well as a 3D printer, I tend to make something if I need it.

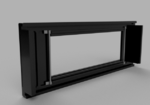
    While I do have a Cambo SC 4x5, I hate the limitations of the 617 back fitted on a 4x5 camera. I also can't and would not pay the price shen hao is asking for their 617 cameras. To that end, I'm designing a convertible field camera to shoot 120 roll film, with dedicated magazines for 6x17, 6x12, and 6x9 images. Maybe 6x7 so I can crop to 6x6 and 6x4.5 without too much waste.

    I've mostly designed the first (617) roll film back except for a few minor details like the closure method to join the two piece backs. I'm using a technique that I often use to build complex geometries that could not otherwise be printed without a ton of supports and having to do a lot of clean up. I print many of the parts split in the middle to create two flat printing surfaces, and then I glue then together in a 3D printed clamping jig where the external clamping surfaces mirror the part geometry. The back of the magazine will be a lamination of 3 separate layers, which will help maintain a flat film plane, and allow for dark slide slot that is able to be fully lined with light trapping material.

    This method will also allows me to have a complex features facing the interior of the roll film back like the film registration ridge that sits proud of the magazine back, and raised ribs and film support rails for greater rigidity while maintaining critical dimensions, as well as recessed flats for locating and mounting two film pinch rollers.

    I was going to design a ratcheting lever film advance, but really I don't need such fineries, but I did include a one way ratchet assembly to assure that I dont have a brain fart and roll the film the wrong way ever. With age I'm finding I have lapses in memory. The good thing is that 3D printing is very inexpensive and I can modify the design quickly by just cutting out the middle of the magazine in fusion 360 to create new components and bodies.


    Click image for larger version. 

Name:	Screenshot 2024-02-28 223522.png 
Views:	21 
Size:	178.3 KB 
ID:	247182

    Click image for larger version. 

Name:	Screenshot 2024-02-28 214242.png 
Views:	18 
Size:	187.1 KB 
ID:	247183

    Click image for larger version. 

Name:	Screenshot 2024-02-28 225444.png 
Views:	17 
Size:	174.9 KB 
ID:	247184

    Click image for larger version. 

Name:	Screenshot 2024-02-28 221340.png 
Views:	15 
Size:	236.3 KB 
ID:	247185

    Click image for larger version. 

Name:	Screenshot 2024-02-28 223040.png 
Views:	12 
Size:	144.6 KB 
ID:	247186

  2. #62

    Re: Show your 3D printed LF photography related thing

    I have used two sets of rollers to guide and pinch the film for two reasons. The first being all my existing backs use them, so they must be better design, and I have two lathes so I can machine rollers very easily out of delrin. I'm using the same material for the bushings/light traps that hold the rollers, and for the light trap caps for the spring plungers that hold the spools in place.

    The smallest rollers that commercial cameras and backs have are mounted in thin spring steel pieces that are screwed to the film back. I hate working with tiny thin spring steel, and I dislike the designs I've seen that omit the rollers, so I had to come up with a solution to allow for downward movement of the rollers when the film is loaded, as well as resisting the slight shear loading on the small roller mounts/bushing as the film is advanced.

    The small roller mounts will be machined from delrin, and will be tiny which will not lend themselves well to drilled holes and screws. So instead I'll use a spring substitute trick I learned while designing lithium battery packs. Poron foam, which is a foamed elastomeric urethane material in sheet form that is very durable, and great for seals and thin springs. I used it in my battery packs to keep the battery cells in constant contact with the copper terminals even under heavy vibrations of off road biking. So I'll use small strips of poron foam with 3M adhesive to fasten the mounts onto the back base plate... this will work very well at maintaining firm contact between the rollers and the film, and I'm fairly confident that the technique will resist the sheer loads well enough too. You can see in the image how small the parts will be.

    Click image for larger version. 

Name:	Screenshot 2024-02-29 000904.png 
Views:	12 
Size:	77.8 KB 
ID:	247188

    I haven't shown the pressure plate that keeps the film flat nor the pressure plates that place tension on the roll film spools, but they'll use a similar technique with poron foam backing. The spool pressure plates will be 3d printed, while the film pressure plate will be a fiberglass plate. I'll use red acrylic rod to machine a rod/lens to view the film back label... and have a cover to block light when not advancing the film.

  3. #63

    Join Date
    Mar 2005
    Location
    Newbury, Vermont
    Posts
    2,292

    Re: Show your 3D printed LF photography related thing

    Wonderful! Very neat and clean design...looks like you're really refining the "state of the art!"

    I do have a question for you about Poron foam: how well does in maintain its "springiness" over time (especially with a large number of "use cycles"), and when also subject to changes in environmental conditions?

    Oh...and another question: the 3D printed material surfaces in your photos look very smooth. Does this smoothness represent what 3D printing is capable of currently? Or are you polishing these surfaces after they come out of the printer? And if you are polishing...do you need to take into account any possible dimensional changes which might result from such polishing?

    Sorry for all the questions - but I've been meaning to ask them for quite some time (especially with respect to 3D printing in general).

  4. #64

    Re: Show your 3D printed LF photography related thing

    Quote Originally Posted by John Layton View Post
    Wonderful! Very neat and clean design...looks like you're really refining the "state of the art!"

    I do have a question for you about Poron foam: how well does in maintain its "springiness" over time (especially with a large number of "use cycles"), and when also subject to changes in environmental conditions?

    Oh...and another question: the 3D printed material surfaces in your photos look very smooth. Does this smoothness represent what 3D printing is capable of currently? Or are you polishing these surfaces after they come out of the printer? And if you are polishing...do you need to take into account any possible dimensional changes which might result from such polishing?

    Sorry for all the questions - but I've been meaning to ask them for quite some time (especially with respect to 3D printing in general).

    I did want to design a better than average 3D printed roll film holder, but I'd not say this was state of the art... I didn't go with lever film advance, nor fancy carbon fiber parts for their flash over substance

    First let me address how Fusion 360 renders designs... they have all sorts of lighting options, reflectance levels, surface roughness settings to allow for accurate rendering if you want to go crazy, BUT I only care about designing and only minimally wish to render parts to show others. So no the renders dont show the surface you'd get with 3D printers.

    I do however use a fair bit of post printing finishing on such parts, especially where I need to mate surfaces together, therefore my design process adds dimension to the printed parts to account for the post print material removal. I also will ensure the parts has greater number of wall layers to allow for finish sanding post printing.

    If you know how heat treated metal parts are machined slightly over size to allow for dimensional changes during the heat treatment, and then finished to final size on surface grinders then you will understand how I design such parts.

    Two sanding the flat mating surfaces of the parts to be laminated I adhere fine sand paper to a precision granite plate and lightly sand away the 3D printed ridges, and use micrometers to test the part thickness.

    To sand other parts that are in confined spaces I use small diamond file plates, and square rods.

    In regards Poron foam's ability to retain its spring, I expect that the foam will not degrade within my lifetime, or at least 25 years. NASA used poron foam in the hubble telescope without failures

  5. #65

    Join Date
    May 2019
    Location
    Stockholm, Sweden
    Posts
    507

    Re: Show your 3D printed LF photography related thing

    Quote Originally Posted by TorontoBuilder View Post
    Poron foam, which is a foamed elastomeric urethane material in sheet form that is very durable, and great for seals and thin springs. I used it in my battery packs to keep the battery cells in constant contact with the copper terminals even under heavy vibrations of off road biking. So I'll use small strips of poron foam with 3M adhesive to fasten the mounts onto the back base plate... this will work very well at maintaining firm contact between the rollers and the film, and I'm fairly confident that the technique will resist the sheer loads well enough too. You can see in the image how small the parts will be.
    Looks absolutely brilliant. Nice to have the ability to work in metal too.

    Poron sounds like something i wanted my whole life. Can you reveal from where you sourced it?
    Lasse Thomasson | Instagram

  6. #66

    Re: Show your 3D printed LF photography related thing

    Quote Originally Posted by lassethomas View Post
    Looks absolutely brilliant. Nice to have the ability to work in metal too.

    Poron sounds like something i wanted my whole life. Can you reveal from where you sourced it?
    I sourced mine from a local healthcare supplier that supplies materials for orthotics manufacturers. i'm sure you can find a similar supplier in Sweden. This is ideal for me since most firms that make orthotics are small and low volume purchasers so those who supply them dont have obscene minimum order requirements. They offer Poron in multiple thicknesses and in grades well suited to use as spring-like uses.

  7. #67

    Join Date
    Mar 2004
    Location
    San Francisco Bay Area
    Posts
    512

    Re: Show your 3D printed LF photography related thing

    I like the idea of making mounting jigs - easy enough to define a block and subtract the volume of the piece in software. One thing I do with larger objects is print a slice or portion of the whole to test fit.

  8. #68

    Re: Show your 3D printed LF photography related thing

    Quote Originally Posted by Graham Patterson View Post
    I like the idea of making mounting jigs - easy enough to define a block and subtract the volume of the piece in software. One thing I do with larger objects is print a slice or portion of the whole to test fit.
    Yes, absolutely test print slices/segments to test, even after calibrating your printer. It is so slow to print some parts that to find out they wont work after 24 hour print is tragic.

    Just bear in mind that when you use the split body function to create any jig or mould you need to make minor tweeks to scale the jig up slightly and perhaps add a slight draft angle to the sides so the jig/mould will close and then open again. The ridges from 3D prints can mean that tight fitting jigs without a draft become locked to the part... Horizontal surfaces are fine without changes, in fact they're the clamping faces so should not be modified.

  9. #69
    ic-racer's Avatar
    Join Date
    Feb 2007
    Posts
    6,763

    Re: Show your 3D printed LF photography related thing

    I did not create these files. I just downloaded the files and sent them to a printing facility for black resin. I'm very happy with the result.

    Click image for larger version. 

Name:	sensor parts.jpg 
Views:	23 
Size:	26.9 KB 
ID:	247208
    Click image for larger version. 

Name:	light parts.jpg 
Views:	21 
Size:	30.3 KB 
ID:	247209
    Click image for larger version. 

Name:	finished.jpg 
Views:	22 
Size:	45.3 KB 
ID:	247210

  10. #70

    Re: Show your 3D printed LF photography related thing

    Quote Originally Posted by ic-racer View Post
    I did not create these files. I just downloaded the files and sent them to a printing facility for black resin. I'm very happy with the result.

    Click image for larger version. 

Name:	sensor parts.jpg 
Views:	23 
Size:	26.9 KB 
ID:	247208
    Click image for larger version. 

Name:	light parts.jpg 
Views:	21 
Size:	30.3 KB 
ID:	247209
    Click image for larger version. 

Name:	finished.jpg 
Views:	22 
Size:	45.3 KB 
ID:	247210
    What is the source? is this a lens tester rig?

Bookmarks

Posting Permissions

  • You may not post new threads
  • You may not post replies
  • You may not post attachments
  • You may not edit your posts
  •