Results 1 to 9 of 9

Thread: Omegalite D wiring and refurb

  1. #1

    Join Date
    Nov 2007
    Posts
    1,135

    Omegalite D wiring and refurb

    I recently got a Omegalite D head and decided to repaint the interior dome,
    since it looked more a dark cream than white.
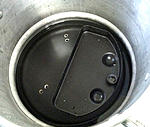
    I wound up losing my tape markers for the ballast wiring, anyone have a picture of the OEM ballast wiring ?


    I wound up stripping all the paint off and repainting -

    The bottom of the Omegalite, which is aluminum, stripped masked and ready for the white hi temp paint.
    Click image for larger version. 

Name:	IMG_01.jpg 
Views:	9 
Size:	242.6 KB 
ID:	105733

    Top of the unit is steel, the interior paint was a bitch to get off, liberal soakings in lacquer thinner
    wire brushing and some nasty stripper got it off -

    Click image for larger version. 

Name:	IMG_02.jpg 
Views:	11 
Size:	240.4 KB 
ID:	105734 Click image for larger version. 

Name:	IMG_03.jpg 
Views:	11 
Size:	109.0 KB 
ID:	105735 Click image for larger version. 

Name:	IMG_04.jpg 
Views:	11 
Size:	70.7 KB 
ID:	105736

  2. #2

    Join Date
    Apr 2013
    Posts
    29

    Re: Omegalite D wiring and refurb

    Am not sure exactly which box mine is in at the moment so it will take a while to find it. If no one else has provided what you need by then, I will open it up and post a photo or two for you.

  3. #3

    Join Date
    Dec 2009
    Location
    Pacifica, CA
    Posts
    1,710

    Re: Omegalite D wiring and refurb

    I found mine, but photographs are not clearly showing the lines and the wiring is simple.

    One side of the ballast has three wires, red, red and black.

    The two red wires connect to one side, both connectors of the bulb. Black goes to line.

    The other side of the ballast has two wires, white and blue.

    The white wire goes to line and one of the connectors on the other side of the bulb.

    The blue wire goes to the last connector on the bulb.

    I'm not sure how to interpret the wires coming out of the bulb connector... Two are white and two are white with blue specks.

    The red wires are connected to one white and one white with blue specks...

    Blue is connected to a white with blue specks. And line is connected to white (and also to the white from ballast).

    A capacitor connects (line, white, white) to chassis.

  4. #4

    Join Date
    Apr 2013
    Posts
    29

    Re: Omegalite D wiring and refurb

    Great. Let me know if you need another reference, otherwise, I don't think I can top Bill's description.

  5. #5

    Join Date
    Nov 2007
    Posts
    1,135

    Re: Omegalite D wiring and refurb

    Thanks for the speedy replies, Bill's written description sort of confuses me more since I believe there has been two
    different ballast case "styles" of Omegalites. The ballasts and wire colors may have changed during the production run.

    One that looks like it has cast aluminum antlers for the thumb screws ( there's one on the Bay right now )
    and the ballast case is long front to back, and mine which is circa 1960's which the ballast case long side is left to right.

    Click image for larger version. 

Name:	IMG_2140.jpg 
Views:	22 
Size:	80.7 KB 
ID:	105764

    The three wires on the right of the ballast are black with fiberglass sheath
    the two on the left are black and white, and the lamp plug wires are all white.
    All the wires on the right are correct since my labeling didn't fall off, it's the left
    side that has me wondering.

  6. #6

    Join Date
    Dec 2009
    Location
    Pacifica, CA
    Posts
    1,710

    Re: Omegalite D wiring and refurb

    Hey, look. There's a diagram on there. What does it say?

  7. #7

    Join Date
    Dec 2009
    Location
    Pacifica, CA
    Posts
    1,710

    Re: Omegalite D wiring and refurb

    Hey, look. There's a diagram on there. What does it say?

    Mine "looks" a lot like yours, but odd that you have all three right-hand side wires heading to the bulb.

    Are you sure your original wiring was as diagrammed?

  8. #8

    Join Date
    Nov 2007
    Posts
    1,135

    Re: Omegalite D wiring and refurb

    Ugh, I hate wiring up fluorescents...

    The three right side wires are correctly connected I didn't lose the markers on those,
    and are just as the diagram on the ballast I checked them with my multimeter,
    the left side wires I followed the diagram and no more fried bulbs
    Thanks Bill

    Click image for larger version. 

Name:	IMG_2148.jpg 
Views:	18 
Size:	70.8 KB 
ID:	105794

  9. #9

    Join Date
    Dec 2009
    Location
    Pacifica, CA
    Posts
    1,710

    Re: Omegalite D wiring and refurb

    Looks like you have light! Great, good luck with it.

Similar Threads

  1. My CC-400 Refurb
    By sam1el in forum LF DIY (Do It Yourself)
    Replies: 13
    Last Post: 29-Jan-2013, 21:50
  2. My refurb 4990 doesn't work
    By briphoto in forum Digital Hardware
    Replies: 30
    Last Post: 20-Feb-2010, 21:43
  3. Kodak 2D Refurb (long overdue)
    By C. D. Keth in forum Cameras & Camera Accessories
    Replies: 17
    Last Post: 23-Mar-2009, 16:13
  4. Cambo identification and refurb question
    By Paul Kierstead in forum Cameras & Camera Accessories
    Replies: 2
    Last Post: 19-Feb-2004, 02:24

Bookmarks

Posting Permissions

  • You may not post new threads
  • You may not post replies
  • You may not post attachments
  • You may not edit your posts
  •