
I took a photomicrograph (200x) of group 6 and 7 of the latest batch of Silverfast targets:


I took a photomicrograph (200x) of group 6 and 7 of the latest batch of Silverfast targets:
It seems a little worse. Any samples with the scanner?
Plenty. Please find one of the samples below.
Heidelberg Tango
New Color
Aperture -5
Resolution (Factor x Resolution) 11kdpi
Scan as negative
No sharpening
No post treatment
How to read the sample? Click here.
If I am reading this correctly the resolution is not even 4000 dpi. But I don't think the issue here is the target. I would double-check the focus using pieces of 1 mil overlays.
In any case, if the scanner smallest aperture is 10 microns then that's as good as you gonna' get.
Looking forward to seeing the results (and scans) of others ;-)
Sure. Here's one from a Howtek scanner using Silverfast's target. 8K dpi native. No adjustments of any kind, of course.
Same image interpolated to 11K dpi, for comparison purpose only.


I bought a Tango which arrived earlier this week. I haven't played with it much to know if this is best I can resolve but posting a Tango vs Scanmate 11000 resolution comparison as a FYI. Both were dry mounted. Will repost if I am able to resolve more resolution from the Tango.
Both scanned at 11000 DPI.
Pali
Hi Sebastian,Originally Posted by sdzsdz

I am trying to follow these steps with my own IT8 profile and am unable to get positive scans in the negative mode. I am using Newcolor 2.5.7 on Mac and even after turning off the Color Assistant (including [A] icon) I get inverted previews and scans. Would it be possible for you to share your profile that I can try this with?
Regards,
Pali
Answering my own question which I get asked via PM occasionally. I did finally figure out how to scan negatives as positives with no USM and I follow these steps to do so using Newcolor 7000. Hopefully this helps anyone else looking at this thread for the same answer I was when I first got my Tango. BTW, I use the same method for scanning slides with USM completely turned off. This is as RAW a scan you can get from Newcolor 7000 software.
Here are the steps to make sure you are scanning negatives as positives with sharpness turned off.
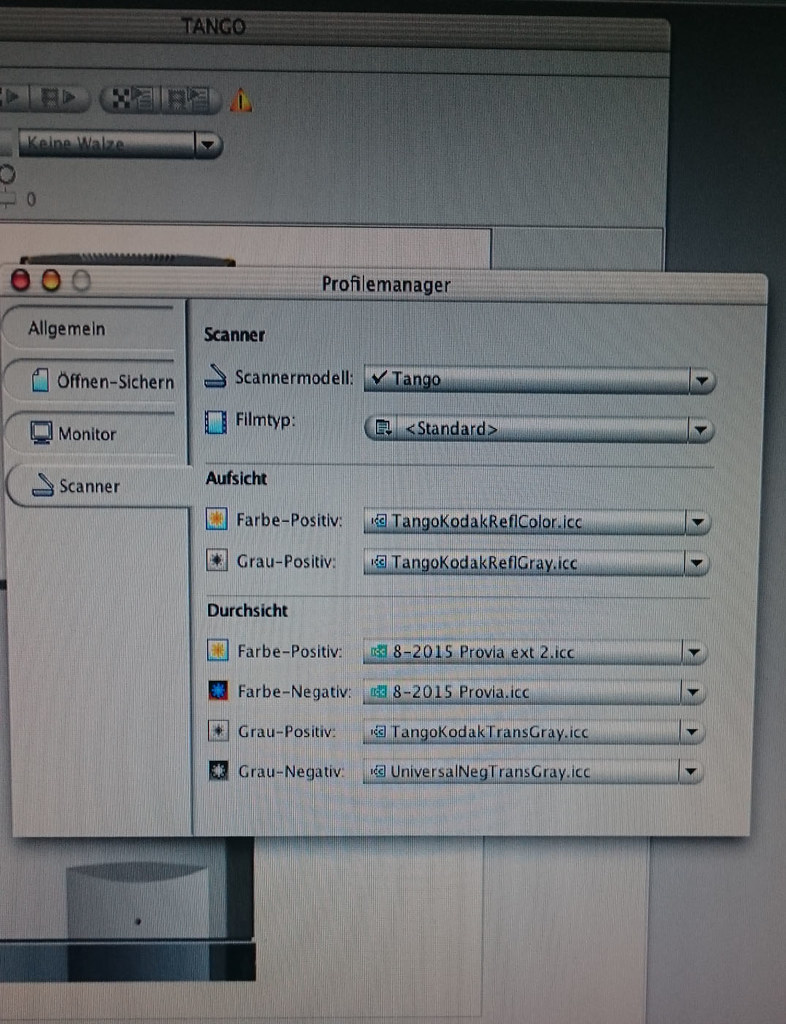
1. From Scan - Special Scanner Functions: Set Negative USM to No USM
2. Set your positive profile for negative scans
DO THE FOLLOWING EACH TIME YOU NEED TO SCAN NEGATIVES BEFORE PRESCAN.
** You can save this as custom settings so you can simply toggle from the drop drown list without having to remember each of these settings below.
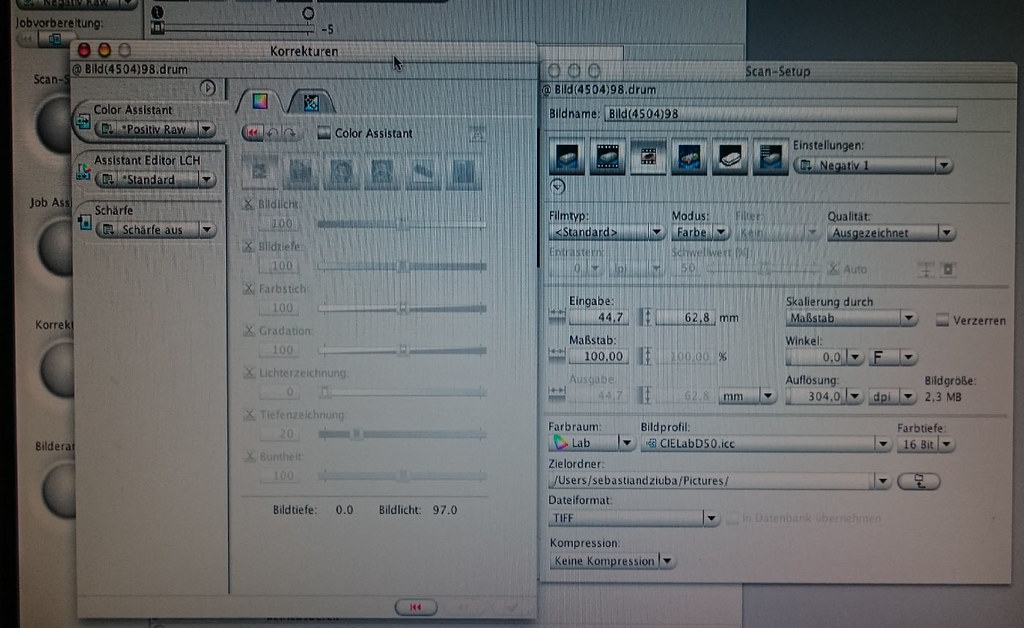
3. Select Negative scanning icon from the top list and select Color from the Mode. I also scan in RGB ProPhoto profile but that is upto you.
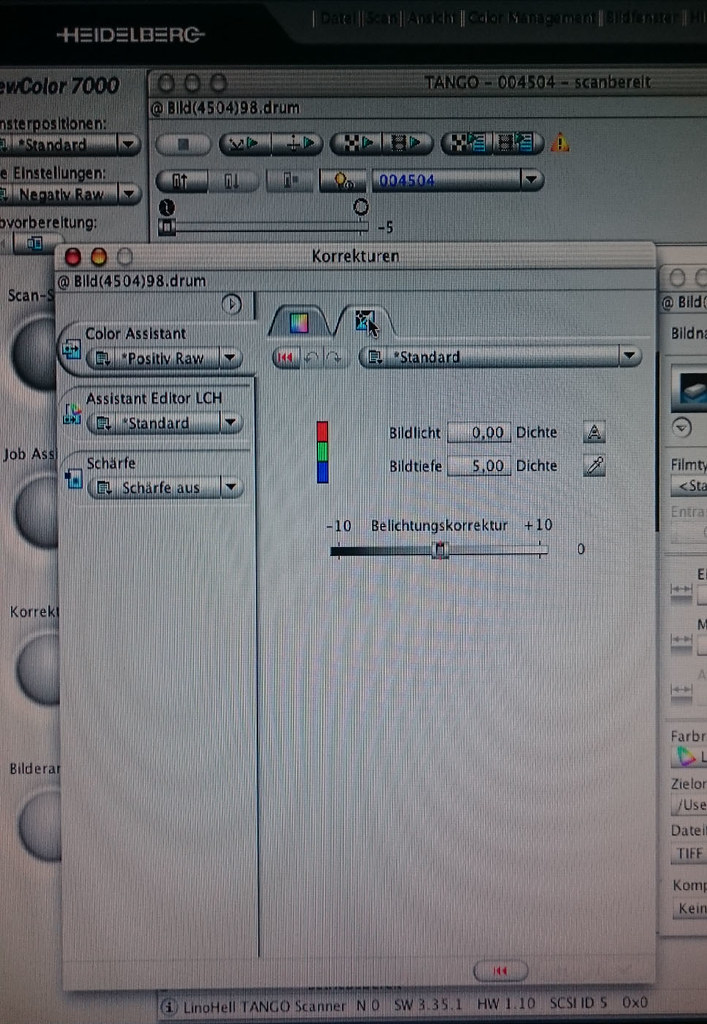
4. Uncheck the [A] on the 2nd tab under Color Assistant
5. Uncheck the check boxes in boxes labeled 1 first, 2 second, and 3 last - This order is very important. At the end, you should have everything unchecked.
From this point forward, you can prescan and scan as normal. You should get a positive scan of your negative in both the preview window and the file you save.
Pali
I haven't been able to use my scanner for a while but recently I've tried your tipps on Portra 400. The results are just lousy, something is still completely off:
I've scanned it in Lab with switched profiles and without any Newcolor/Colorperfect adjustments (density 0-5) - sharpening is turned off - that worked:
But the results cannot be altered in photoshop in any acceptable way, I converted them to RGB in the Pro color space:
(left is converted in PS; right scanned with the regular negative functionality of Newcolor in RGB/Adobe 1998 color space)
What am I missing? Thank you!
 Posting Permissions

 Reply With Quote


Bookmarks