
its not that over exposed, you have a nice range of tones, from blackest black to almost white!Originally Posted by jermaineB


its not that over exposed, you have a nice range of tones, from blackest black to almost white!
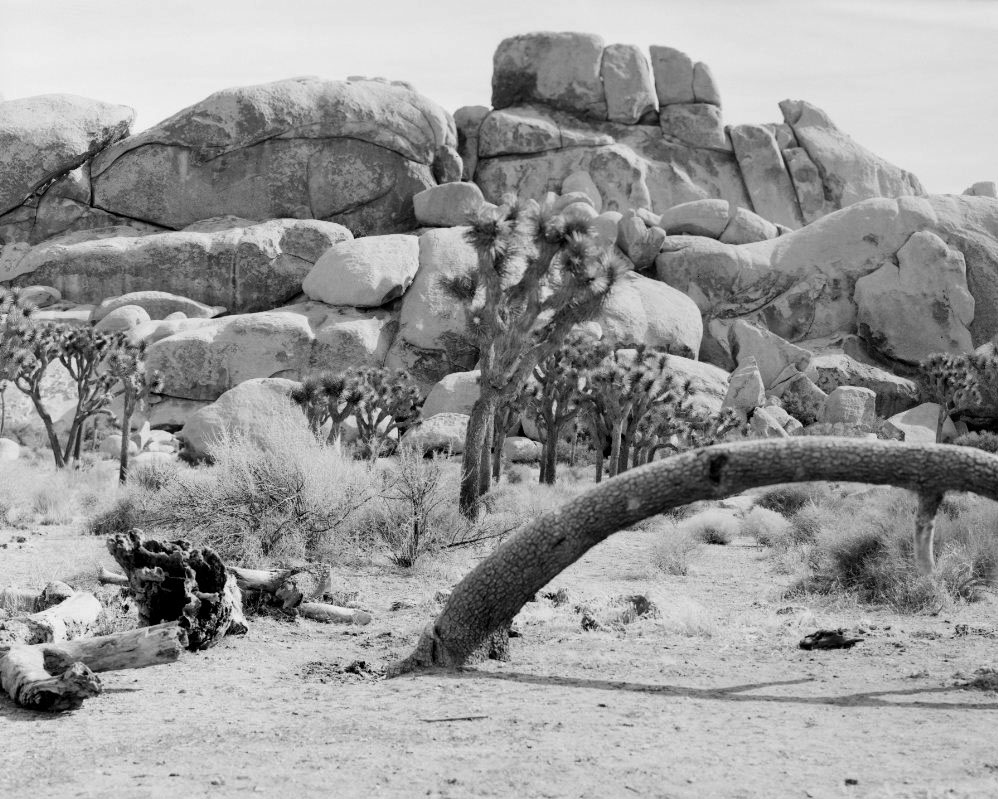
That's interesting, it has almost an infrared-esque look. I think you could work that up to a very nice print.
One man's Mede is another man's Persian.

That's a nice shot of the desert, if a little over-exposed, but its not a good test of your developer methods. The books advise using a smooth, out of focus, solid toned area to see if the development is really smooth, but you can often tell from blank sky areas if your methods are producing even toned results. In Cody's shot of the girl, it looks to me like the lighter areas around the edge of the negative are from uneven development, where the developer is moving more vigorously around the edges of the negatives during agitation. This is the shortcoming of both the Yankee and the HP Combi, and tanks in general; the possibility of increased edge development. The movement of developer over a negative must be the same over the entire surface or you will get slight localized increases in development. That produces the light toned vignetting you see on a lot of work.
John Youngblood
www.jyoungblood.com

Thanks for the compliments. I wish I had a my 90mm lens instead of the 210mm I had at the time because of the curved bark. I also think if I had a 29 filter I may have been able to darken the sky. Since I was my first development I just kind of experimented. I also have a Jobo processor that I haven't used yet. I'll test and see if there's a difference between the two processes.
I wish I could make a wet print from it but I don't own a LF enlarger...only 35 and medium format. Maybe one day when I have a collection of negatives and saved chemistry and someone decides to part with 4x5 enlarger for cheap ; )
It is an age since the last posts on this thread. I still home develop my own B&W and Colour film, from the 110 cartridge of old, through to large format 4x5.
For my 4x5 film developing I have used various systems/tanks and have found that used correctly, (and with practice) they all have there merits. This thread is appears to be about the 4x5 Yankee daylight developing tank, I will restrict my 1st post to my experience with it, and it will be short but positive.
A great piece of kit, use it! The only negative comment I will make is that agitation can cause the chemicals to 'slop' out of the top slot. So, my solution was to make a liquid tight top cap to put over the pouring slot; now no worries!
One more comment regarding the Yankee, placing the lid on the tank is counter intuitive. By that I mean that when positioning the lid, do not match the corner lips, rather position the lids protruding lip to the opposite corner to the tanks protruding lid. It makes a tight fit, I also add two rubber bands around the lid and tank for extra security, (probably not required, but I do it just in case!).
So, those who use it as plant pot,are missing a trick, and good system.

Yankee made at least TWO 4x5 tanks that can be used for processing. One is the Yankee Agi-Tank which comes with a 4x5 multi-sheet holder and HARD top. That appears to be the one being discussed here. They also made a Yankee Utility Tank with a black, FLEXIBLE cap, and uses hanging film holders. I have both. I use the Agi-Tanks for the chemical steps, but use the Utility Tanks for intermediate and final rinsing/clearing/washing.
And I use the Yankee Master Developing tank for smaller formats since they have both adjustable 35mm/120/127/620 reels and 16mm/35mm reels (the latter are EASILY modified to accept Minox) -- and allows me to process DIFFERENT-sized smaller rolls AT THE SAME TIME!
Last edited by xkaes; 24-Sep-2017 at 05:51.
When I use the agi-tank I apply a strip of masking tape around the lid (except the corner with the drain) to keep the liquid from sloshing out during agitation. Much more tidy.
Good idea. A question for you, how do you orient the lid, with the lips on tank & lid in same corner, or opposite corners?
I have the Yankee tank, an earlier bakelite version FR tank, and the newer SP445. When I was processing six or more sheets the FR tank was my favorite over the Yankee, and neither gave me development problems with normal agitation. The FR tank sloshes less than the Yankee and is slightly easier to load for some reason. For single sheet semi-stand development I prefer the newer SP445 tank.
The magic you are looking for is in the work you are avoiding.
http://www.searing.photography
 Posting Permissions

 Reply With Quote
Bookmarks