


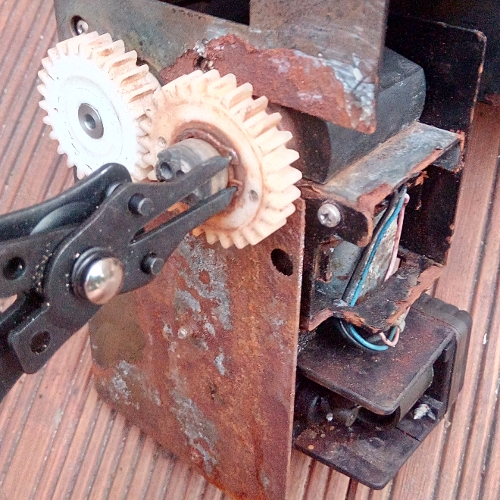
This processor has been accompanying me in my photographic adventure for over 10 years. It is a really great tool, which has been a bit sick during this time. The cause of the current impotence was an incident that took place about 2 years after I purchased the equipment. The incident seemed harmless, although, as it turned out later, it was gradually accumulating problems. This incident was the blockage of the movable nozzle of injection of chemicals into the developing tank. Normally, when inserting the tank into the processor, you need to pull the lever that retracts the nozzle, hides it slightly in the housing, so that you can put the tank on the guides. When the lever is released, the nozzle slides slightly into the hole in the developing tank. A piece of the nozzle broke when trying to unlock it. A small piece of 6-8mm. However, it turned out that the nozzle remained long enough to reach the hole in the tank. I decided that since the nozzle reaches the tank, chemicals are poured into the tank normally, the problem is not a problem. I forgot about it for the next few years, when suddenly, after turning on the processor, a position error appeared. At the time, I didn't really know what I was talking about. I decided to disassemble the lower part and check what's in the grass. It turned out that one screw blocking the chemistry collection plate came out and instead of the plate, it blocked the rotation of the entire chemistry collector, causing an error. I cleaned the screw, screwed it in and I assembled the processor. Nevertheless, the processor began to drain chemistry with other hoses than usual. The developer with the fixing hose, the second developer with the first developer hose and the fixer with the second developer hose. I flushed out the hoses, changed the decals, and let it go. Imagine my surprise when one day I took out a slide from the processor that was absolutely transparent. A quick diagnosis and I see the second developer is still in the tank, which means it didn't take part in the process. The first developed the silver image, the second did nothing because it stayed in the tank, and the bleach fixer rinsed the silver image and that's it for cool slides. It was too much, so I decided to do something about it. I dismantled the processor again from the Divider Module side, i.e. the chemistry collector, which also serves as a distributor of air pumping chemicals from the tanks to the corks. I replaced the rusty spring that pressed the air distributor disk, I noted traces of corrosion inside the device on the metal brackets. Corrosion caused by chemical stains from a just damaged, broken nozzle. Then I cleaned everything inside. I decided that since I am currently making few slides, and BW (I switched to collodion) the same cleaning will be enough. I didn't want to take the whole thing apart for restoration. Firstly, it was not a priority at the time, and secondly, the amount of work that was created there was very discouraging. I assembled the processor. I made a missing piece of the nozzle from the pvc pipe and the slides were nice again. Until I developed two batches of slides one after the other. The first batch was perfect, the second had strange colors. That meant there was contamination in the bath somewhere. I excluded the inside of the processor, because the first batch was fine. Suspicion again fell on the chemical nozzle. The nozzle sleeve made from a tube did not drain the chemical residues after it was rolled into the cork. This caused, in developing the next batch, contamination of the FD developer bath with the CD developer. Unfortunately, the repair had to wait another 2 years of changes in life, renovation of the house, etc. Now, however, I returned to the renovation of the processor, on the occasion of organizing a new darkroom. I undressed him again and wrung my hands. Even more work than before. The corrosion deepened.
Since I never kept the broken part of the nozzle, I didn't know how it was constructed. I didn't know how this draining of chemical residues after pumping it into the tank works. I found a photo of the nozzle module online on one forum and compared it with what was left of mine. I decided to replace it, but there are none on the market and Durst no longer has replacement parts. I could make it either CNC milling or 3D printing. The second option seems to be more interesting, because it is faster and cheaper to implement. Based on a broken nozzle from my processor and photos on the internet, I made a 3D model of this part. I used free 3d CAD -> FreeCAD software for this process. I recommend this software, which is developed by people with technical, mechanical, construction, CNC, etc. knowledge. The program has many possibilities, many workbenches, i.e. work modules. It's really cool and for needs like mine, it's completely sufficient. It was there that I designed a camera with a 50x50cm plate format.
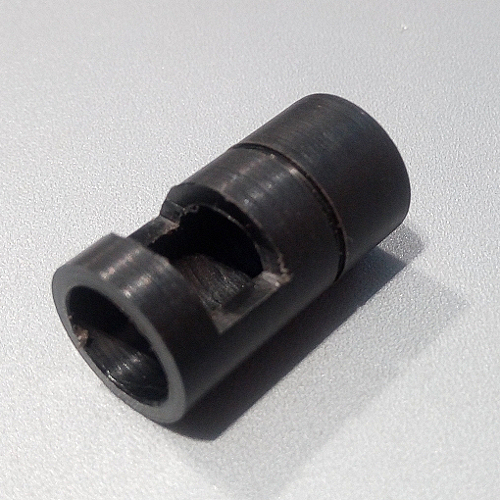
broken nozzle
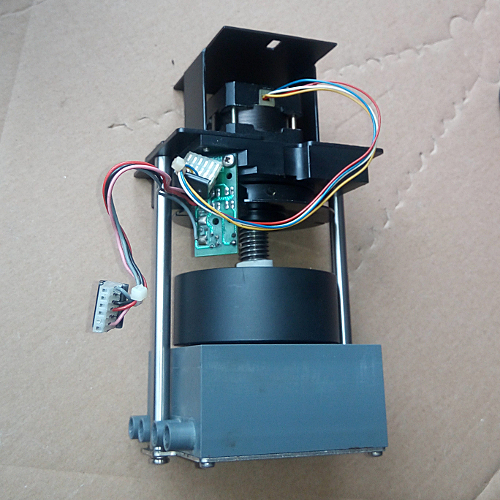
I ordered the printing of the model in a 3d printing company. While waiting for finished unit, I renewed all the corroded sheet metal parts of the processor. After removing the rust (it's strange that it wasn't made of stainless steel, like all the screws) and removing the old paint coating, I painted the elements with matte black paint twice. Now they look great and I think they are protected against possible corrosion for the next few years of work, although I do not plan to break the nozzle again. At the same time, I disassembled and cleaned the entire Divider Module. I removed rust deposits from a corroded screw and from a corroded divider plate's axis. I also replaced the spring cover.
I started assembling modules that I dismantled for the renovation of sheet metal elements of their construction. And so, one by one, I assembled all the elements and waited for the delivery of the printed chemistry nozzle. While waiting, I replaced the silicone divider hoses and labeled them nicely with new FD, CD, BX and 1, 2, 3 respectively.
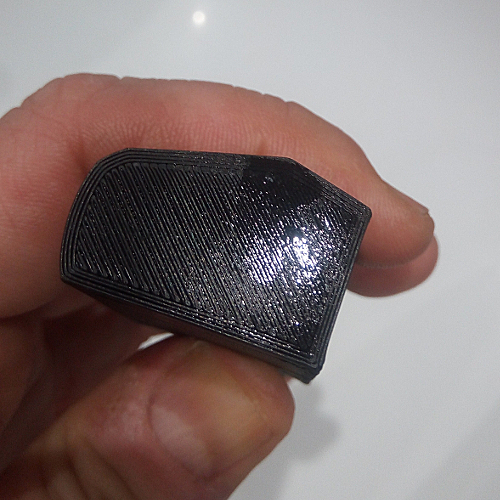
I finally picked up the printed nozzle. I love those moments when the details drawn or designed by me finally become material. That's when I feel like fulfillment. I just love the moment when I hold in my hands for the first time an element that just a few moments ago was just a collection of thoughts, which I then dumped in the form of planes to the computer. A fascinating feeling
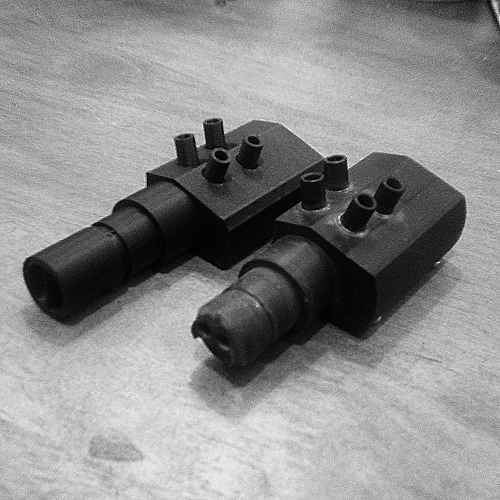
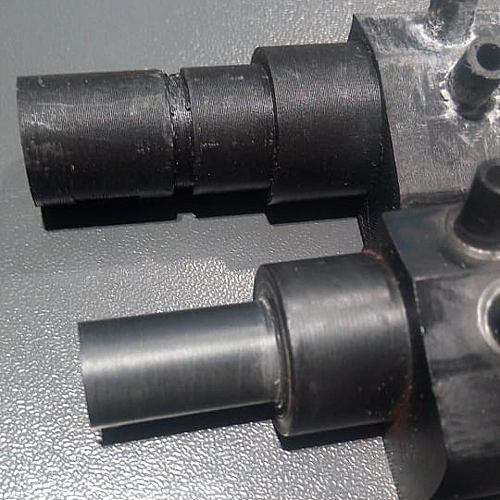
Comparission of wo nozzles (left - printed, right - original, broken)
Unfortunately, it turned out that 3D printing in FDM technology is not entirely suitable for printing tight elements. The first nozzle passed the liquid through the mounting holes, the second, improved, through the entire back wall. I couldn't afford any leaks, because if the nozzle leaks through the walls, it's probably also through the chemistry channels, which will result in 100% contamination of the baths, and this is a simple way to poorly developed slides.
Another option was to mill the nozzle on a CNC machine, but it turned out to be very expensive, almost as much as I paid 10 years ago for the entire processor. I designed the nozzle from welded elements, made of 304 steel, but the idea also fell through due to the laboriousness of the operation and the rather high cost of cutting out all the elements and the welding itself. Another idea is 3D printing in SLA technology, a resin hardened by laser light, which would certainly be "tight", but due to the funds already invested, this solution turned out to be so expensive that the whole plan would cease to be profitable. I came up with the idea of bushing the nozzle. Usually the holes are bushed to improve their diameter. But who said you can't bush a roller? So I came up with the idea that I would turn the old nozzle (I have access to a lathe) to a diameter that would allow the insertion of a prosthesis of the part that was broken, in the form of a bush. The only problem was setting the axis of the nozzle in the axis of the spindle, which required making a device, a holder. After turning the nozzle, it seems thin, but the prosthesis that will be glued there will solve the problem. The nozzle will be regenerated, almost like new.
After obtaining the material, I turned and milled the"bush" with a fairly tight fit, so that the old rule that "good glue holds when there is no glue" can be applied
Then I glued the whole thing together with the appropriate glue. I was afraid of gluing with quick glue, but it was recommended for this type of material. I had to set the rectangular chemical residue discharge hole very carefully. But it worked.
The Supply Module has been adjusted to be rure it does not work at an angle. The whole thing looks like new.
That's how I finished regenerating the nozzle and repairing the processor. I checked it with water and it looks like everything is ok . �� The processor is waiting for tomorrow's development session ��


 Reply With Quote
Bookmarks