
So briefly how are you using it your workflow and was i correct about pressing the Lock Exposure to reveal the sliderOriginally Posted by Ted Baker


So briefly how are you using it your workflow and was i correct about pressing the Lock Exposure to reveal the slider
Once you have your scanned RAW file in Tiff format, are you then doing the conversion in ColorPerfect, Negfix8 or another way
Yes, removing the lock exposure reveals the slider, and then you can manually control the exposure. If you don't do that it will use the value calculated from the last preview scan. This is downside of vuescan is that while you CAN choose exactly what you want if you choose the wrong option, you might not get what you wanted...
How I use it?
I have all the options set I want for a particular type of film. I scan the entire platen area in one pass.
These options are:
1. RAW, i.e. take the digital values that come out of the buffer after the A/D has converted them and pixel shift algorithm has completed, and put them in a file untouched.
2. Have the exposure set so that the RGB values come close to 90% linear values (can see on the raw graph) for a particular film stock. For BW you only need one color...
Nothing else. Very simple and fast, or at least as fast as epson is !
I then use software details here https://www.largeformatphotography.i...-film-scanning
though I use a more updated version.
1. To digital cut and frame each image
2. I then invert using the same (at least similar) method as the Kodak Cineon system, though I am still building my calibration matrices... (that is not in the github release)
I have something similar working for my D700 (DSLR).
Ultimately I hope to make something useful that will probably work best with A DSLR, but my old 4990 is still useful. Plus I like to some photography at the same time :-)
Thanks Ted.
Just to clarify one thing...
You mentioned that you adjust the exposure slider to give you white or 90% of the film edge. Would the film edge not give you black as it is clear or am I missing some step
No the film base being the most transparent part of the image will let the most light through, this will give the highest value on the sensor. i.e. close to "white" or "1" if your using normalised numbers. I would expect to see normalised values approximately 0.9 in the file i.e. 0.9 x 2^16 = 58982. If you put the Raw graph on it vuescan it will show a graph of these values against a linear scale. That is good enough, it just the consistency that matters 0.85, is just as good a 0.95. But you do not want to go over 1.
I have just done a preview of some film edge. Would you agree this doesn't look right. The graph is also set to RAW view
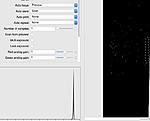
No it looks good, if you look at the raw file outputted it should look white or have values close to white, it might vary a bit depending on what program you open it with.
If you scan RAW it should look like film, if may look dark at first if you imaging tool does not understand that file is saved with a gamma of 1. i.e. without any gamma encoding. If your shooting HP5 it should look like a negative.
If you tick the lock exposure butting what factor is displayed?
The outputted value of the film edge in Photoshop shows an L value of 97
I presume by scanning the entire bed, you then manually crop the image. Doe scanning the entire bed not affect the final image size?
Using L in photoshop in THIS instance will probably just confuse you if you don't understand the underlying formula.
No I as mentioned earlier I wrote some software to do that, but for 4x5 it is not really necessary
Yes, until it is cropped, but that doesn't really matter.
Is there a method you can suggest to measure the value of the white or is an understanding of the formula required for this
 Posting Permissions

 Reply With Quote
Bookmarks