
Mark - can you tell us any more about your KVM modification to accept 6x6 boards? I have a lot of vintage glass on 6x6 boards that Id like to be able to directly hang on the front of a recently acquired KVM.
Originally Posted by Mark Sawyer


Mark - can you tell us any more about your KVM modification to accept 6x6 boards? I have a lot of vintage glass on 6x6 boards that Id like to be able to directly hang on the front of a recently acquired KVM.

I don't think I can, really. I did it a decade or more ago, and about all I remember is it wasn't terribly hard once I got into it. Just a kind of adapter board the same size as the front standard faceboard.
"I love my Verito lens, but I always have to sharpen everything in Photoshop..."
It is just an adapter board - awesome, thanks for the information!
Next question... what are you hauling your KMV around in? Have you found a good backpack or case to haul? In my case, it would be nice to find something that would haul the camera and 5x7 back.
Actually, not an adapter board; I replaced the front plate that goes between the front standards, but if you took it off the camera, it would look like an adapter board, and took about the same effort to make as an adapter board. I had to disconnect/reconnect the bellows, but that's not a big deal.
I carry it around in an f/64 backpack made for 8x10 cameras. It fits very nicely, as does my 2D and B&J. It's the best solution I've ever seen for carrying 8x10s! Highly recommended!
"I love my Verito lens, but I always have to sharpen everything in Photoshop..."
Wish I'd known about that backpack when I had my KMV. I used the original fiberboard suitcase, rather impractical in the field. The one we had at Kodak seldom left our studio/workspace so it wasn't an issue there. Having the proper location kit, especially with the larger formats, is very important.
Thanks for the clarification. There are at least three different methods to make the conversion. Did you enlarge the opening in the front plate?
I completely replaced the front plate. It was pretty simple to fabricate a new one.
"I love my Verito lens, but I always have to sharpen everything in Photoshop..."
New Question: Could one of you fellows out there who has an 8x10 Kodak Master Camera confirm that the front and rear bellows frames should be glued inside the last flap of the bellows? This is my recollection, but as I said, I disassembled the whole thing and scrapped the original, leaky bellows (stupidly) without studying it closely or taking pictures.
You may recall that I no longer had the rear bellows. Since I wasn't able to get my hands on an original frame, I just measured the space myself and drew up a plan:
(Here is a iPhone picture of a computer screen showing the plan)
I got estimates from metal shops ranging from $45 to $250 to fabricate the frame. I went with the $45 fellow (obviously) and I just got it back yesterday. It's perfect. I'm going to drill the ten tiny holes, paint it matte black, and send it (along with the original front frame) to Custom Bellows in England. When I get the new bellows back, I'll just use tiny bolts and nuts to secure the new rear bellows to the rear standard.
But as I said in that question up above, I just can't recall if the front frame should be glued to the inside of the bellows. I know that it is a rather complicated arrangement. Here are the only two pictures I could find online showing the back side of the front standard:
I'm sure the folks at Custom Bellows will know what to do, but I just want to make sure that my instructions to them are clear and correct.
Thank you fellows for all of your help.
Cameron Cornell
Washington State
www.analogportraiture.com
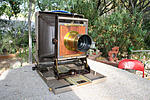
After solving the myriad of little issues surrounding the rear bellows frame and awaiting all of the component parts to come in from all over (bellows, lens board, hardware, ground glass, Stone Photo Gear wraps), I finally tested the Kodak Master View last weekend with a 10" Wollensak Vitax. It was a pleasure to use and the negatives look fine. I'll be taking this setup to Europe for five weeks starting June 26.
Thank you fellows for your advice.
Cameron Cornell
Washington State
www.analogportraiture.com
 Posting Permissions

 Reply With Quote
Bookmarks