
It is according to the brand. I make sure that they are pure, unadulterated whites with absolutely no additions. When I can find them I but kosher whites.Originally Posted by BrianShaw


It is according to the brand. I make sure that they are pure, unadulterated whites with absolutely no additions. When I can find them I but kosher whites.
Ah, interesting. Yes, it appears that those that are 100% egg white and nothing else will say so onthe packaging. I just looked at a few brands on their internet site and found that most appear to be 100% egg white. But one brand, Eggbeaters, has two products - one that is 100% and another (original) that does not make that claim nor states clearly what else may be in the product... but they clearly state that it is from real eggs.
p.s. Eggbeaters also has some flavored varieties, Florentine, etc, but I figure those additions are quite obvious in terms of being non-white of an egg.
After some difficulties with floatation coating I used a foam brush which gave me a more even surface. I should probably go for double coating but I am not sure how to do it without isopropyl alcohol. I might try the iron at home. I am a bit tired of the lack of control over salt and albumen printing so adding one more step isn't very exciting.
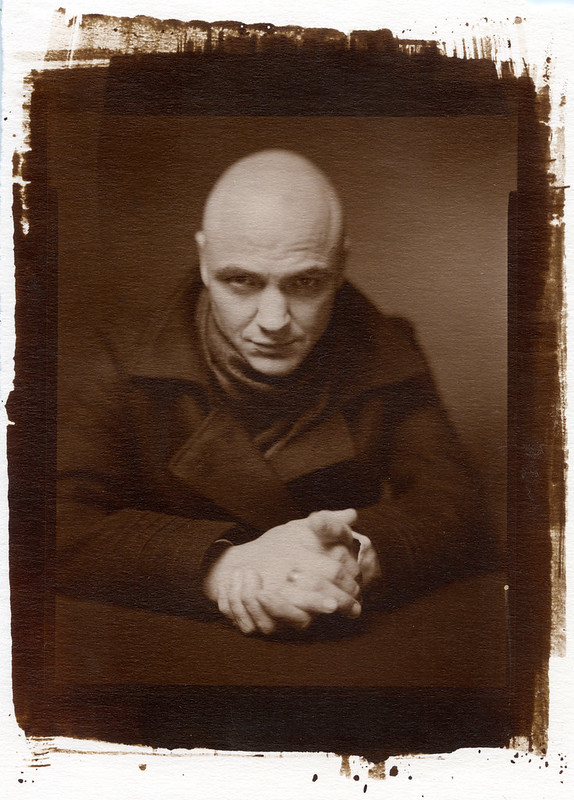
These came out better than the 4 images before them which gave me all kinds of trouble. The negatives are, at least good for albumen and salt; super dense.
They are quite hard to scan. You can see some gloss show up in certain parts.
I did try to flatten a few prints with a hot iron which made a big change in color in most of them. Salt prints that looked very chocolaty turned cool brown which I am thankful for.
img322 by rabato, on Flickr
img324 by rabato, on Flickr

They look fine to me Rairo. Makes me want to try the process.I made the albuin about 9 months back and its been sitting in the fridge ever since. I wonder if it is viable after being in the refrigerator for so long? Are you supposed to store it at room temperature?
Thomads
They say the older the better. I left mine in the fridge for about three months. It's turned a bit green but it doesn't smell bad.
Well 5 years later I can report that I have successfully made my first albumen print this afternoon. A few months back I coated a sheet with the albumen that I mixed in 2014 and tried to apply it with a puddle pusher. Didn't work out and I tossed that batch of albumen. Then, a few weeks ago after reading the new Tyler Green Carleton Watkins book and pursuing Carleton Watkins: The Complete Mammoth Plates, I decided to give the process another try. This time, instead of extracting the albumen from fresh eggs as before, I bought a carton of liquid egg whites (about 500mL) and prepared the coating according to the accepted formulas. However not paying careful attention to the instructions I added the optional photoflo to to the mixture before blending with an electric blender. But I didn't think this would be a problem since the photoflo would be more evenly distributed throughout the mixture then if added after the blended mixture is poured into its final storage bottle for use.
After a week in the refrigerator the albumen was ready for use and I bought a Pyrex casserole dish especially for the process (~$6.00 at Walmart) but the dish is contoured and an 8x10 sheet of paper does not lay flat on the bottom so 1 sheet of paper was wasted. I transferred the albumen to a flat-bottom Cresco tray that I had originally planned to use and folded up the sides of the paper to make a boat for floating but that ultimately turned out not to be necessary. Five sheets of paper were floated for 3 minutes each and then lightly dragged over the smooth edge of the Cresco tray but an uneven coating was the result. However those 5 sheets taught me that making a boat wasn't necessary and how to lay the sheet flat on the albumen. The bubbles that appear after each sheet are easily moved to the side of the tray – I used a wooden coffee stirrer stick like they have at Starbuck's or Pete's. As before I lightly dragged the sheet over the edge of the tray but this time I squeegeed the coated paper with the puddle pusher to even out the coating. One pass is sufficient. Before hanging I left each sheet upright for several minutes to allow the albumen to sink into the pores of the paper and the last sheet I left upright without hanging. No difference was discernible.
The next week was rainy but a favorable weather forecast was for today. The negative that I choose was of a view off of Stage Coach Road in San Gregorio that I had photographed over 20 years ago. Due to its proximity to the coast with the attendant water vapor issue and expansiveness encompassing about 20 miles rolling landscape and valleys, obtaining a “sharp” photograph throughout is probably impossible. I closely monitored the local weather forecast and chose the day and time when the relative humidity would be at it lowest which also coincided with the best lighting which was the afternoon when the sun provided for frontal lighting from the west. The view was captured on Ilford 5x7” FP4+ film with a 610mm Apo-Nikkor lens on a Toyo 810MII field camera fitted with a 5x7 back. I first printed that negative a few year ago as a Kallitype toned with a Gold Thiocynate toner and in comparison the Kallitype has the greater Dmax but the coloration of the Albumin print – which I didn't tone – is much more pleasing to my eye. But this was the first print with this process,which was single coated with albumen and without adding a contrast enhancing agent to the sensitizer so a print with greater Dmax is certainly possible.
In summary, the albumen silver print is a viable process capable of producing both unique and aesthetically pleasing images and is now in my toolbox.
Thomas
Nice!
How did you apply the sensitizer? Puddle pusher, brush, or float?
Back when I experimented a bit with albumen, my personal conclusion was that only floating (especially the sensitizer, but preferably the albumen as well) would consistently yield usable results with good evenness. That's also why I bookshelved this process, as I didn't particularly like the necessity of a tray of silver nitrate solution.
I applied the silver with a new hake brush that I bought from B&S a while back - a nice brush which they no longer carry on their website. Floating the silver would have been a mess and would result in wasting lot of silver. After coating several hundred salt, kallitypes, etc with a hake brush I was pretty confident of my ability with a hake brush. I liberally apply the silver by dipping the brush into a small circular watercolor palette that I picked up at a local art store and lightly brush the silver on until the paper takes up a shiny pearl sheen - just like with the other processes. No brush strokes resulted. I posted a scan of the print at the end of my blog entry https://www.spiritsofsilver.com/blog...print_12152019. which doesn't capture the actual rich color of the print.
Thomas
I your brush and your skills in using it; I always got strokes with mine. And a puddle pusher never worked quite well for me with the fragile albumen coating. For that reason I stick to salt prints and a puddle pusher for both the salt and the silver, but I may give it a go with a better brush one day.
Actually I don't think the brush makes that much of a difference. For years I used the cheapest Chinese made Boar hair hake brush sold at Blick - ~ $3 for the 1.75" version now a little more costly. They have a metal ferrule and it is advisable to apply super glue along the edge to keep the bristles from shedding on the paper. Works fine and I thought of buying a new one at Blick for the albumen when I remembered the B&S brush I bought some time back but never used. It's a Joto C-5 hake brush made in Japan using goat hair without a metal ferrule and no need to use glue.
Thomas
 Posting Permissions

 Reply With Quote
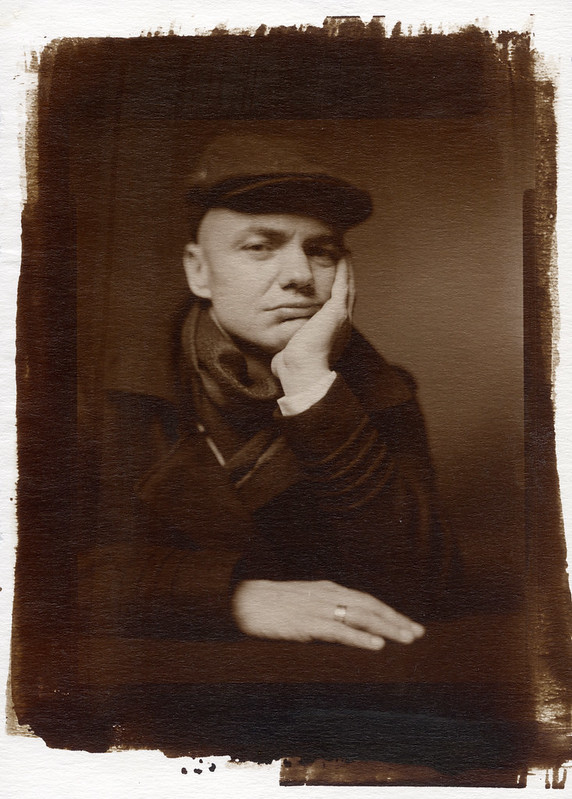
Bookmarks