

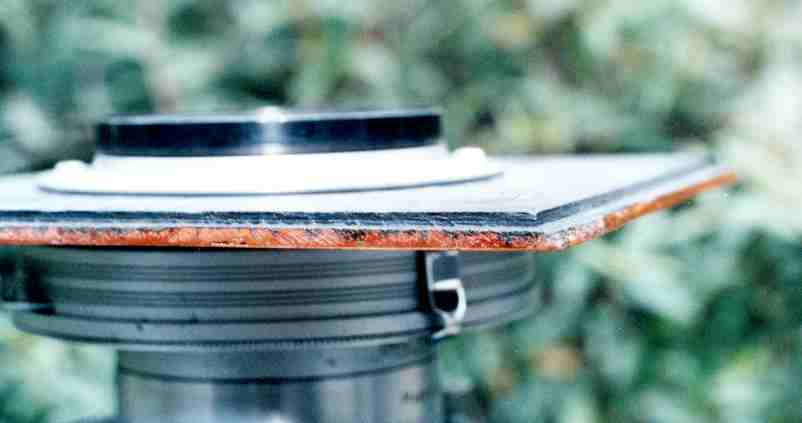
The finished product. Does the photographer have a "before" picture? Of course not!
by Kevin Bourque for the Large Format Page.
The finished product. Does the photographer have a "before" picture? Of course not!
Fast-forward a few years. I've done a good bit of furniture refinishing, and was looking for a new project. I'd thought about the camera, of course, but the paint bothered me for two reasons. First, getting rid of paint is, pardon me, a real bitch. Removing the first 95% is easy; removing the last 5% can take the rest of your life. Second, I'd learned that that if the manufacturer has applied paint, it probably wasn't because he wanted to hide the antique American cherry underneath. I was prepared for nasty, second rate wood. Expecting to be disappointed, I got started. Turns out I was pleasantly surprised.
This is also a good time to check for that bane of all wooden cameras. No, not termites, loose screws. Very often, screws will strip out, leaving nothing for the threads to bite on. There are a few ways to address this. First and most commonly, you can use larger screws. Second, you can glue a piece of wood into the hole, making it smaller. A small dowel rod works well, and a wooden matchstick will do in a pinch. Break it off close to the surface. Don't worry if it sticks out; we'll sand it flat later.
Be very gentle backing out the screws. If you strip the heads, you will have no choice but to drill them out, and you really don't want to do that. I had to drill one (I didn't replace it).
I had to cut the bellows out with a razor knife. Mine was totally shot, and I'm guessing yours is, too. If it's still in good shape, and you want to save it, the rest of this project may be problematic for you. You can't do all the messy chemical work with the bellows in place, and you can't remove it with out damaging it. Some cameras have the bellows attached in frames that can be unscrewed, but not the B&J.
Once you've cut it out, scrape out the remainder from the inside of the front and rear standard.
I got a replacement from Flexible Products in Clearwater, Florida (www.flexproducts.com; they advertise in Shutterbug) Unfortunately, they don't stock a natty red replacement (I don't know of anyone who does), so, black it is. You send them the old one, and they send you an identical replacement. The guy on the phone said that they used to manufacture bellows for B&J, back in the day. Two weeks and $150 gets it delivered to your door. (Editor's note: as of Summer 2004, The site is no longer active - the message reads "Flexproducts.com is for sale").
So now we've got it in pieces, and all the metal bits are stored safely away from cats and small children. Time to work on the wood. As I've said before, paint removal is sometimes tedious. Having said that, I was surprised at just how easy the "B&J blue" came off. I stripped the whole camera in an afternoon. I recommend Kutzit or Stripeze (I used a little of both). One is a heavy paste, and unfortunately, I've forgotten which one! The can will tell you. The paste stays where you put it, but the thinner stuff is a little easier to work with. Both will get you where you're going. Beware, this stuff is NASTY and TOXIC. Read all the warnings and heed them. They were using this goop as neurotoxin long before anyone discovered it would strip paint. Wear heavy rubber gloves. If they tear, get a new pair. Wear long sleeves and long pants.
In a reply to my original post, Matt Oulman suggested using 3M Safest Stripper. "I have found that the best answer for me, regarding the toxic-waste paint strippers (and a guilt-driven desire to avoid them) is to use 3M "Safest Stripper". It is relatively non-toxic, and you don't even need gloves unless you (to use 3M's words) expect "long-term exposure". There are no fumes, it's non-flammable, and can be used without ventilation worries. Contact time is longer (of course), something like 2 hours, but it really works and paper towels, rags, etc. can be disposed of in regular trash. It comes as a paste, and is brushed on - scraped off. A damp, fine "stripping pad" will remove any residue (or a plastic "pot scrubber-type pad")."
Another safety note. The paint on these cameras was brewed back when cars had metal dashboards and no seat belts. It contains LOTS of lead. The goo you're scraping off would make the Toxic Avenger turn pale. If you do any sanding later, do it outside and wear a mask. But, try to remove all the paint with the chemicals. It's easier, trust me.
Kutzit and Stripeze work like this. You paint them on, and wait ten minutes or so while the chemical does it's thing. You'll see the paint start to bubble up and get loose. If it looks dry, apply more chemicals. Resist the temptation to start scrubbing the paint off until the chemicals have done their job (you can use this time to review the thirty or so discrete steps required to shoot a picture with an 8x10 view camera. If it helps, the last step in the sequence is usually "Kick the tripod, return to step 5"). Use a flat metal scraper to get the melted paint off, and repeat as necessary. Scrape gently; you don't want to gouge the wood and make more work for yourself later. The last little bits can be wiped off with a rag dipped in the same chemistry. If you have to dig it out of the corners, use a SOFT wire brush and more chemicals. If you're careful and persistent, you'll never know the wood was painted to begin with.
When you're finished stripping the paint, pat yourself on the back for a good day's work (take your gloves off, first). Set the wooden parts aside to dry.
Did you notice that the camera was made out of very nice maple? Who would have guessed?
I used a palm sander for most of the sanding. The curved surfaces to not lend themselves to this, so you'll need to do them by hand. Be careful not to round off any corners. I started with #80 paper, and then used #120 and (I think) #220. The #220 paper might not make that much difference, so you might be able to dispense with it. Try it and see. When you're done sanding, soak a clean rag in mineral spirits (a.k.a. paint thinner) and wipe down all the pieces. This will remove all traces of dust. Set them aside and let them dry.
Here's where you might want to construct a clothesline so all these parts can hang in the air while we do the refinishing. Pick a spot where the parts can hang undisturbed for as long as you will be working on them. String up a cord at least 3' in length, and hang as many strings from it as you have wooden parts (I think I had eight). I actually hung the parts from an attic cross-tie, but I'm guessing most people will have to use a clothesline. Find a way to hang each part so that you can get to all the wood. For instance, the two extension rails and the base have 1/4 threads in them, so you can screw a bolt into them and tie the string to that. You might have to be creative for the rest of the parts.
Follow the directions on the can of stain. I rubbed in about four "coats", applying all the stain the wood would hold. Let it dry between applications.
I used orange shellac as a sealer and finish. It's got some color to it, and it adds a beautiful richness to the finish. There are other options, such as lacquer. You could use urethane, but please don’t tell me if you do. Good wood shouldn't be smothered in plastic!
Most good woodworking shops carry shellac. It's a little bit of a pain to work with, but it looks great. Here's how I used it. You dissolve the flakes in denatured alcohol at a ratio of about one part flakes to nine parts alcohol (it takes about a half hour to dissolve the flakes). This makes a very thin solution. You want to paint on LOTS of thin coats. The alcohol evaporates rapidly, and by the time you finish painting all the parts, the first ones might be dry and ready to re-coat. I applied about twenty coats over a few days. Some recommend gently rubbing the shine off with #0000 steel wool every five coats or so. Don't get overly enthusiastic or you'll wear right through the finish. When you get down to the last few coats, mix the shellac about twice as thick as the first batch. You want the last coats to have more body to them. If the nice fellow that the woodworking shop gives you advice different from mine, listen to him, not me! The brush cleans up in the denatured alcohol, by the way.
When you finish the last coat, rub it down again, just enough to take the shine off. Doesn't it look GREAT?
You'll need a table saw and a tiny amount of skill for this next part. Need I say that table saws are DANGEROUS, and it's hard to work the camera without all your fingers?
I used 1/4' plywood (really 3/16"), which is just slightly too thick to fit. You need to take off 1/16" in a band 3/16" (slightly more is OK) all the way around the edge (see the picture). I'm not going to tell you how to make a table saw do this. If you don't know, you need to have someone with experience show you, or buy a lensboard. They're on eBay now and then. Mine was 6" square, and I bet yours is, too.
You'll finish the outer surface same as the camera, and spray the inner surface flat black.
This is a good time to mention the other parts that need to be black. Remember we identified them, before we tore apart the camera? Use low-tack masking tape to conceal the parts you don’t want to paint, and be generous with the tape. It's cheap, and getting paint off your new finish is expensive, trust me. Conceal everything you don't want to paint. Make sure the tape is well seated where it meets the soon-to be painted surface, since it can creep under the tape if it's loose. Use flat black spray paint; several thin layers rather than one thick one (sound familiar?). When the paint is dry, take off the tape and admire your handiwork.
I had a 12" Commercial Ektar, which required a 3" mounting hole. You can get hole saws at the hardware store. Practice on a piece of scrap before you destroy your new lensboard. In fact you ought to make several, so you'll have spares.
Fortunately, putting the camera back together is pretty straightforward. Be gentle putting the screws back in, so you don't strip them. These tiny screws are hard to find! Use the reference you created when you took it apart.
It's at this point we deal with the bellows. It's really not that hard. The surfaces to which you will glue it must be roughed up with sandpaper, and clean of paint and finish. You'll probably have to strip off some of that black paint you just applied. The glue won't hold otherwise. I used contact cement, but ask the bellows people what they recommend. Before you apply and cement, decide how you are going to clamp the glued surfaces while it's drying. You might have to be creative. I used some steel strips and large binder clips. You want to keep pressure on as much of the glued surface as you possible can. Move the clamps around while it's drying, so all areas get some attention.
It is possible to attach the bellows before of after the camera is reassembled, but getting that front standard back in the rise/fall tracks is a little difficult with the bellows attached. I was able to do it, though.
When you attach the bellows, be sure the seam goes on the bottom!
After I reassembled my camera, I noticed that the friction locks on some of the movements didn't really grab as well as I wanted them to. Fortunately, this is easy to fix. I had some fake textured leather that has a peel and stick surface on one side. You can probably get it at hobby shops. I cut small strips and placed them inside the contact points where the two wooden surfaces meet. Place them so you won't have to look at them most of the time. These dramatically increase the amount of friction and make for a good, solid, clamping action.

I also noticed that both the front and rear extension tracks drooped ever so slightly. In other words, they weren't parallel to the main part of the base. I used a few strips of the same material in between the components as spacers, and the rails are now just as flat as can be.
I don't need to tell you to stand back and admire your project, because you've been doing that all along. You now have an 8x10 view camera with plenty of movements, and you can always brag about how much hard work you put into it. Is it the lightest, sexiest camera ever built? No, but I'm guessing that most of us aren't the lightest, sexiest photographers, either. Now, go buy some film, and get shooting.
I want to hear about your project, and of course I'll answer questions if I can. You can reach me at kbourque@comcast.net.
P.S.: This is an amplified version of a post I put on the Large Format Digest in February 2001. Thanks for everyone who replied (especially if I've stolen your suggestion or comment!).