


DIYS (Do It Yourself Scanner—pronounced like ‘dice’)--Negative Stages Thread
Frank Pertronio started this project by suggesting that someone come up with an affordable and contemporary drum scanner, as there is currently huge gap in price and quality between consumer and professional scanners. Domaz suggested using APS-C sensors and using them to take samples of the film, similar to what Gigapan does with large stitched mosaic images. This lead to talk about making a copy stand scanning system using a dslr, a light source and a movable negative stage. Both horizontal and vertical prototypes have been made, or are in the process of being made.
The original thread has become very long and unwieldy. As a result, I’m creating some new specialized threads for future project development.
The new build threads are:
Camera Supports and Positioning,
Lenses,
Negative Stages,
Light Sources,
Stitching and Blending of Images,
Cameras and Camera Control Software.
Workflow.
These threads are only for positive contributions to the development in the area in question. The project may not succeed, but we’re going to find that out by trying it. But we are not unkind. As the original thread showed, some people have an overpowering urge to say negative things about the project. I’ve created a thread just for this purpose. Please post your negative comments about the project here.
I would like to thank everyone who makes, or has made, a positive contribution to this project!
I'll be summarizing the posts from the original thread about negative stages here soon.

 Reply With Quote
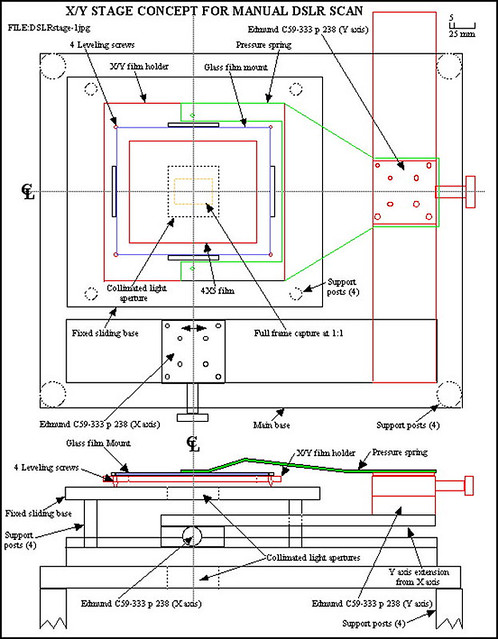


Bookmarks