
Thanks Steve!Originally Posted by Steve M Hostetter

Yes,material-wood zebrano!


Thanks Steve!
Yes,material-wood zebrano!

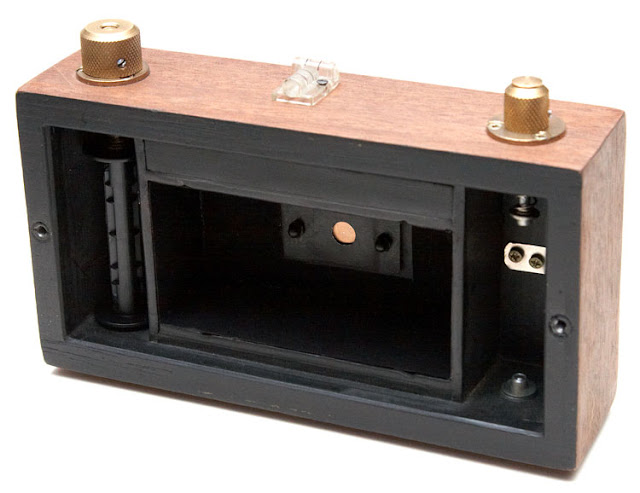
My new back now glued together and with the pressure plate fitted. Finger joints to match those of the main body. Much better than the temporary plastic back I had.
I just need to add some brass catches to hold the back on and sort out the accessory shoe properly for mounting the viewfinder. I might try to make the viewfinder look a bit prettier as at the moment you can see that it is made from several layers of plastic.
Steve.
Wonderful camera!
My Homemade 6x12 Pinhole camera.

Great stuff all round-
all beautifully pout together-
I like that last result from the pinhole too, lovely tones-
Nuce. Where did you get that double spirit level from? I was intending to put a recess in mine for a spirit level tube and the brass plate from an old Rabone wooden spirit level.... but I forgot to do it!
Steve.
Love the pressure plate but how do the spring attach to the back to stop it falling off?
Thanks for the nice comments Joseph!
The pressure plate has two leaf springs behind it from a Mamiya C33. I just copied the Mamiya design but stretched it to cover the larger film area.
When the back fits onto the body, it pushes the pressure plate back by about 1mm. In my initial tests I had rubber bands and gaffer tape holding it together. Today I am going to fit some catches to hold the back on.
Steve.
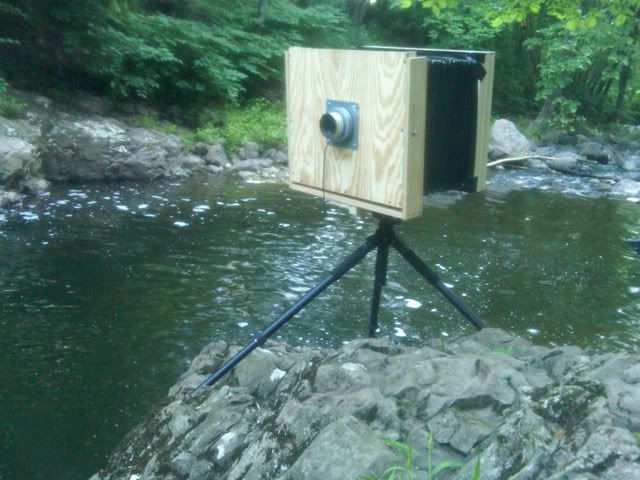
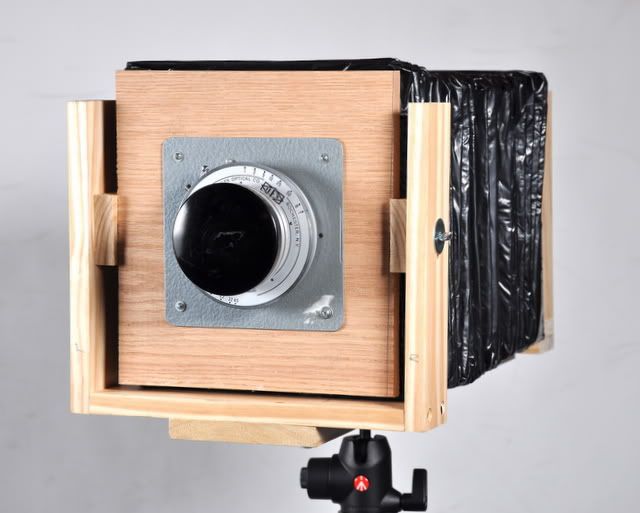
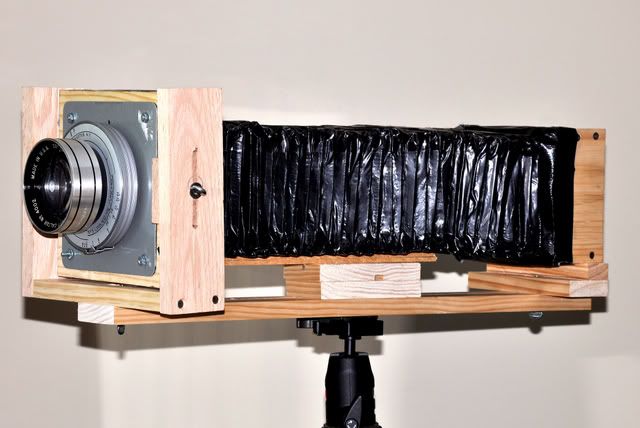
Got my hands on a longer lens (around 500mm) and decided to build a couple of cameras that it could be used in. The first is a 16x20:
Picture was taken with my cell phone while out taking a picture of a waterfall. The second is an 8x10 portrait camera:
Third, just for fun is a 4x5 telephoto. Totally made from scrap wood I had lying around from building other cameras.
In the 16x20, the lens is a gentle wide. In the 8x10, is it a telephoto. In the 4x5, a long telephoto. I had to make the bellows for each custom sized.
As for the 16x20, I had to make the filmholder as well. The 16x20 (minus the lens) cost me less than $100 to build. Here's a video detailing the filmholder, the camera back, and folding the bellows (made out of heavy construction paper and black contractor clean-up bags with lexel glue):
 Posting Permissions

 Reply With Quote

Bookmarks