Page 1 of 6 123 ... LastLast
Results 1 to 10 of 58

Thread: Discolored white borders on prints

  1. #1

    Join Date
    Feb 1999
    Posts
    1,095

    Discolored white borders on prints

    Well, I've been having some processing issues in the darkroom. In another thread (from yesterday), I discussed strange gray speckles on the backs of some of my prints along with brownish stains visible when the print is backlit. When backlit, light shines through where the gray specks are.
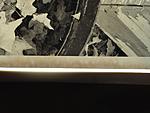
    Today, I rinsed and selenium toned two prints. I mixed fresh toner with distilled water. After washing the prints with the help of Perma-wash, I hung them to dry. As you can see from the attached image, the borders are discolored with some sort of stain. This staining is only visible when the print is backlit.
    I use Ilford rapid fix (1 minute). Could this be some sort of selenium-fixer interaction?
    My fixer tests as good using hypo check.
    One of the prints from today had the gray speckles on the back, but the other didn't. Both, however, have the stained white borders. Some of this staining is probably into the image area, although I cannot see it.
    I thought perhaps my selenium toner might be dirty, as I tend to re-use it again and again. I mixed fresh today with distilled water, but still see the staining.
    After a 5 minute rinse, followed by Perma-wash, I washed both prints for 15 minutes in running water, shuffling them and dumping the tray at frequent intervals.
    Before toning, I held the wet prints up to the light and did not see any staining. So the toning must be causing something -- right?
    Sorry to be so wordy, but it's hard to describe what's going on without rambling on.Click image for larger version. 

Name:	IMG_1633.jpg 
Views:	69 
Size:	38.8 KB 
ID:	212639

  2. #2

    Join Date
    May 2007
    Location
    New York City & Pontremoli, Italy
    Posts
    884

    Re: Discolored white borders on prints

    I think you're right in thinking that it's the toning causing the stain; I had the same experience a few years ago. Not sure what's causing the speckles.

    This is the sequence I now use to prevent the Selenium from staining (Ilford FB paper) - it is taken whole from an excellent book on printing by Carson Graves:

    After the fixer:

    Wash for 10 minutes
    Perma Wash for 3 minutes
    Selenium Toner (distilled water) for -3-5 minutes
    Perma Wash for 5 minutes
    Rinse in running water for 30 secs.
    Wash for 45 minutes

    This is a lengthy sequence and I sometimes shorten it this way:

    After the fixer:

    Was for 10 minutes
    Tone in a bath of Selenium/Perma Wash (distilled water) for 5 minutes
    Rinse for 30 secs.
    Wash for 45 minutes.

    The downside to this Selenium/Perma Wash bath is that Perma Wash does not last indefinitely.

    https://www.routledge.com/Elements-o.../9780240803128

  3. #3

    Join Date
    May 2015
    Location
    SooooCal/LA USA
    Posts
    2,803

    Re: Discolored white borders on prints

    In practice, grey on prints is usually a fixer issue, as when fixer is loaded up to capacity, free silver can build up as dark grey soot like fine particles... (Think the color of an old lab fixer tank/tray...) Eben when cleaned, can be contaminated...

    Try new fix after vessels have been cleaned with tray cleaner...

    Steve K

  4. #4

    Join Date
    Sep 1998
    Location
    Oregon now (formerly Austria)
    Posts
    3,406

    Re: Discolored white borders on prints

    Ben,

    Basically, two things cause this kind of staining (i.e., selenium toner stains). 1. trying to tone prints that are inadequately fixed and 2. transferring prints from an acid solution directly to the toner.

    Are you transferring the prints directly from the fixer to the toner? If so, Ilford Rapid Fixer at the 1+4 dilution may be too acid, thereby causing stains. If this is indeed the culprit, you have two solutions: 1. wash prints thoroughly before toning. 2. Use a less-acidic fix before toning. I use the weaker 1+9 dilution immediately before toning as fixing bath two.

    If that's not your problem, then the fix is, so make sure your fix is really doing its job. Hypo-check is totally inadequate for the job of testing fixer for fiber-base prints processed for optimum permanence. It's better to use fresh fix and use throughput for a guide. Use two-bath fixation and fix no more than 35-40 8x10s per liter of bath one.

    If you're not using two-bath fixation, your fixer capacity is really low; no more than 10 8x10s per liter for optimum permanence.

    You can transfer prints from bath two directly to the toner if the fixer is not too acidic, as noted above. You can use an alkaline fix for bath two, but I've had great results for years with good old Ilford Hypam or Rapid Fixer at the 1+9 dilution.

    A final thought; what paper and developer are you using? I had staining problems with Liquidol and Adox MC-110. That wouldn't be your combination, would it?

    Hope you find your problem,

    Doremus

  5. #5

    Join Date
    Feb 1999
    Posts
    1,095

    Re: Discolored white borders on prints

    Quote Originally Posted by Doremus Scudder View Post
    Ben,

    Basically, two things cause this kind of staining (i.e., selenium toner stains). 1. trying to tone prints that are inadequately fixed and 2. transferring prints from an acid solution directly to the toner.

    Are you transferring the prints directly from the fixer to the toner? If so, Ilford Rapid Fixer at the 1+4 dilution may be too acid, thereby causing stains. If this is indeed the culprit, you have two solutions: 1. wash prints thoroughly before toning. 2. Use a less-acidic fix before toning. I use the weaker 1+9 dilution immediately before toning as fixing bath two.

    If that's not your problem, then the fix is, so make sure your fix is really doing its job. Hypo-check is totally inadequate for the job of testing fixer for fiber-base prints processed for optimum permanence. It's better to use fresh fix and use throughput for a guide. Use two-bath fixation and fix no more than 35-40 8x10s per liter of bath one.

    If you're not using two-bath fixation, your fixer capacity is really low; no more than 10 8x10s per liter for optimum permanence.

    You can transfer prints from bath two directly to the toner if the fixer is not too acidic, as noted above. You can use an alkaline fix for bath two, but I've had great results for years with good old Ilford Hypam or Rapid Fixer at the 1+9 dilution.

    A final thought; what paper and developer are you using? I had staining problems with Liquidol and Adox MC-110. That wouldn't be your combination, would it?

    Hope you find your problem,

    Doremus
    Doremus,
    Thanks for the input. No, I'm not going directly from the Ilford Rapid Fix to the toner. After fixing, I rinse/wash the prints for 5 to 10 minutes in running water, shuffling and dumping the water and refilling, etc.
    After that -- and it might be the next day -- I soak them and then put them into the selenium toner.
    I use a single fix bath (1+4), and you're right, inadequate fixation is probably my problem. But I don't make high volumes of prints -- maybe two or three (not including multiple test strips) in one session. So I'm assuming my single-bath fix (1+4) remains good for multiple darkroom sessions. I store it in a brown glass bottle and check it with Hypo Check.
    So it must be inadequate fixation. As per Ilford's direction, I fix prints for 1 minute.
    I would have never noticed this problem if not for accidentally viewing the prints with back light. They look fine under normal, from above, illumination.
    Is there a better way to check the fix's strength? And I guess I need to start using a two bath fix? Don't have a lot of room in my sink for multiple trays, though.
    Thanks to everyone for advice -- much appreciated.

  6. #6

    Join Date
    Feb 1999
    Posts
    1,095

    Re: Discolored white borders on prints

    Forgot to mention -- I'm using Ilford Multigrade Classic and Multigrade paper developer. As well as Ilford stop and Ilford rapid fixer. Thanks again!

  7. #7

    Join Date
    Sep 1998
    Location
    Oregon now (formerly Austria)
    Posts
    3,406

    Re: Discolored white borders on prints

    Ben,

    I'm placing my money on inadequate fixation then. If not that, then inadequate washing before toning; maybe 5-10 minutes isn't enough.

    Maybe my workflow will help you, since yours seems similar already.

    During my "printing" sessions, I develop, stop and give fix 1 (Ilford Rapid Fixer 1+9 for 1.5-2 minutes). I then wash (60 minutes in a slot-type washer) and dry the prints. Those that make the final cut after that get collected over time and go to a toning session.

    During my "toning" session, I soak the prints and give them fix 2, which is always freshly-mixed before the session (again, Ilford Rapid Fixer 1+9). Prints then go from fix 2 directly to the toning bath. After the desired amount of toning has been reached, the prints go directly to a hypo-clearing bath (mixed from scratch; sodium sulfite and bisulfite). From there, a quick rinse and into the washer. I don't worry about going directly to the hypo-clearing bath, although the carried-over toner does diminish the capacity. I have lots of sulfite and bisulfite on hand and can mix more easily; having the extra tray and step would be a lot more of a hassle.

    Two things I really recommend.
    First is two-bath fixing. By mixing the second bath fresh and keeping the throughput low, you are always ensured of well-fixed prints (more later).
    Second is not trusting the Ilford short-fix sequence. In theory, using strong fix for a short time should fix the emulsion without letting fixer soak into the paper base and thereby shorten wash times. I imagine if I were working with one-bath fixation (and the small capacity it requires) and small prints, it would work fine. In practice, however, keeping the fix fresh enough (only 10 8x10s per liter, remember) and the fixing time to just 60 seconds is difficult for me. Heck, a 16x20 print takes 20+ seconds to drain completely - do I include that time in the total fixing time? Or not? Fixing longer than the 60 seconds lets the paper base get saturated with fixer, which requires a longer wash time. I'm happy to wash longer

    Still, if you want to try, here's Ilford's optimum permanence sequence: https://www.ilfordphoto.com/ilford-o...nce-fb-papers/
    Note that they give a separate sequence for selenium toner (scroll down a bit) and that they transfer directly from fixer to toner without an intermediate rinse. Note also that the wash time is rather long; 30 minutes.

    Finally, a word about fixer longevity. If you use Rapid Fixer one bath and want to process for optimum permanence, 10 8x10s per liter is your limit. For "commercial" standards, Ilford says 40 8x10s per liter. With a two-bath regime (either 1+4 or 1+9) the capacity is increased: 35-40 8x10s per liter of bath one (remember, there's a bath two as well, so overall it's about 20 8x10s per liter for the whole thing). That's throughput; keep count of your prints (and test strips, etc.) and forget the hypo-check; it's not nearly sensitive enough for print fixer (barely enough for film fixer). And, keep track of how long you keep your fix. It will last 7 days in an open tray, one month in a partly-full bottle and six months in a full, tightly-capped bottle. I rarely keep fix around for 30 days...

    With two-bath fixation, after you run 35-40 prints through bath two, you can turn around and use it for bath one for the next printing session. That makes it even more economical.

    FWIW, I've been using the above regime for 30+ years and never have a stained print...

    Hope this helps,

    Doremus
  8. #8

    Join Date
    Feb 1999
    Posts
    1,095

    Re: Discolored white borders on prints

    Quote Originally Posted by Doremus Scudder View Post
    Ben,

    I'm placing my money on inadequate fixation then. If not that, then inadequate washing before toning; maybe 5-10 minutes isn't enough.

    Maybe my workflow will help you, since yours seems similar already.

    During my "printing" sessions, I develop, stop and give fix 1 (Ilford Rapid Fixer 1+9 for 1.5-2 minutes). I then wash (60 minutes in a slot-type washer) and dry the prints. Those that make the final cut after that get collected over time and go to a toning session.

    During my "toning" session, I soak the prints and give them fix 2, which is always freshly-mixed before the session (again, Ilford Rapid Fixer 1+9). Prints then go from fix 2 directly to the toning bath. After the desired amount of toning has been reached, the prints go directly to a hypo-clearing bath (mixed from scratch; sodium sulfite and bisulfite). From there, a quick rinse and into the washer. I don't worry about going directly to the hypo-clearing bath, although the carried-over toner does diminish the capacity. I have lots of sulfite and bisulfite on hand and can mix more easily; having the extra tray and step would be a lot more of a hassle.

    Two things I really recommend.
    First is two-bath fixing. By mixing the second bath fresh and keeping the throughput low, you are always ensured of well-fixed prints (more later).
    Second is not trusting the Ilford short-fix sequence. In theory, using strong fix for a short time should fix the emulsion without letting fixer soak into the paper base and thereby shorten wash times. I imagine if I were working with one-bath fixation (and the small capacity it requires) and small prints, it would work fine. In practice, however, keeping the fix fresh enough (only 10 8x10s per liter, remember) and the fixing time to just 60 seconds is difficult for me. Heck, a 16x20 print takes 20+ seconds to drain completely - do I include that time in the total fixing time? Or not? Fixing longer than the 60 seconds lets the paper base get saturated with fixer, which requires a longer wash time. I'm happy to wash longer

    Still, if you want to try, here's Ilford's optimum permanence sequence: https://www.ilfordphoto.com/ilford-o...nce-fb-papers/
    Note that they give a separate sequence for selenium toner (scroll down a bit) and that they transfer directly from fixer to toner without an intermediate rinse. Note also that the wash time is rather long; 30 minutes.

    Finally, a word about fixer longevity. If you use Rapid Fixer one bath and want to process for optimum permanence, 10 8x10s per liter is your limit. For "commercial" standards, Ilford says 40 8x10s per liter. With a two-bath regime (either 1+4 or 1+9) the capacity is increased: 35-40 8x10s per liter of bath one (remember, there's a bath two as well, so overall it's about 20 8x10s per liter for the whole thing). That's throughput; keep count of your prints (and test strips, etc.) and forget the hypo-check; it's not nearly sensitive enough for print fixer (barely enough for film fixer). And, keep track of how long you keep your fix. It will last 7 days in an open tray, one month in a partly-full bottle and six months in a full, tightly-capped bottle. I rarely keep fix around for 30 days...

    With two-bath fixation, after you run 35-40 prints through bath two, you can turn around and use it for bath one for the next printing session. That makes it even more economical.

    FWIW, I've been using the above regime for 30+ years and never have a stained print...

    Hope this helps,

    Doremus

    Doremus,
    Thank you — I really appreciate it.
    So my problem is more likely to be inadequate fixing, ie, weak or exhausted fixer. And this, therefore, causes the print to stain when toned in selenium?
    Or inadequate washing, or both?
    I’m not a prolific printer, only doing a few 8x10s during a typical darkroom session. Based on your advice, then, if I want to stick with a single-bath fix, I need to really limit the bath to no more than 10 8x10s. And 1 minute ( per Ilford’s instructions) should be okay, if I don’t exceed that 10-print limit?
    I’ve been using Hypo Check for a long time, blissfully thinking if it didn’t turn cloudy, then the fix was good.
    After toning, I use Heico Perma-wash for five minutes, followed by the wash cycle in an 11x14 tray, shuffling, dumping, etc. if I had a slot-type print washer, it would make life easier.
    Anyway, I appreciate your detailed response. I’ll mix up some fresh fixer next time and see if that cures the stained borders.

  9. #9

    Join Date
    May 2015
    Location
    SooooCal/LA USA
    Posts
    2,803

    Re: Discolored white borders on prints

    For DWFB, if you are using a rapid type fix, you can use the film dilution for prints for 30 seconds, and this is helpful for archival conservation as the image completely is fixed, but much less time to start soaking into paper base, so washes better...

    You still need to follow the bath capacity of 10 prints per bath...

    Steve K

  10. #10

    Join Date
    Sep 2014
    Location
    Montreal, Canada
    Posts
    2,014

    Re: Discolored white borders on prints

    This is strange. Considering Ben's stated throughput, as long as temperature is ok and there is agitation during fixing, 1 minute in Ilford Rapid Fix 1+4 should be fine, so I'm puzzled.

    I wonder if Perma Wash could be a factor somehow. Perma Wash is not exactly a hypo clearing agent, so it might be a variable to consider.

Similar Threads

  1. Yellowish-Brownish borders of my prints
    By norm the storm in forum Darkroom: Film, Processing & Printing
    Replies: 11
    Last Post: 12-Jan-2014, 17:50
  2. Prints from scans; posters, borders, etc...
    By gevalia in forum Digital Processing
    Replies: 7
    Last Post: 21-May-2010, 11:27
  3. Green and white prints
    By Ron Marshall in forum On Photography
    Replies: 3
    Last Post: 18-Jul-2008, 22:29
  4. White lines around LF prints
    By violin in forum Darkroom: Film, Processing & Printing
    Replies: 9
    Last Post: 30-Jan-2002, 17:07

Bookmarks

Posting Permissions

  • You may not post new threads
  • You may not post replies
  • You may not post attachments
  • You may not edit your posts
  •