Page 4 of 23 FirstFirst ... 2345614 ... LastLast
Results 31 to 40 of 227

Thread: Darkroom Renovation Phase 1

  1. #31

    Re: Darkroom Renovation Phase 1

    My New Delta Six Foot Darkroom Sink by Nokton48, on Flickr

    Just drove all the way across town, and bought this Delta 6 foot Darkroom Sink for Fifty Bucks It sells new at B&H for almost $800, when you figure in the freight. I think it will hold three 16x20 Patterson trays so I think I am good to go. This will work well with the Kreonite 4x4' Sink to it's left, and the Calumet 16x20 print washer in between the two sinks.

    Not too shabby! Needs to be pressure washed thoroughly, though Yuck! No cracks I can see, soon will be as good as new.
    Flikr Photos Here: https://www.flickr.com/photos/18134483@N04/

    “The secret of getting ahead is getting started.”
    ― Mark Twain

  2. #32

    Join Date
    Jan 2013
    Location
    Madisonville, LA
    Posts
    2,412

    Re: Darkroom Renovation Phase 1

    I know what you mean, about 30 years ago I bought a 6' SS Leedal sink at Helix for $250. The shipping cost way more than the sink! Good find. Don't forget to support the sink every 8" to 12" or so, esp if you're going to put that print washer in it. I had a plastic one on a wooden stand with supports underneath every 6"-8" or so. The Leedal metal stand that came with the SS sink came with supports at 24" OC, I put a support in between each one, so now they're every 12" oc.

  3. #33

    Re: Darkroom Renovation Phase 1

    Thanks Luis! Yes I'm very concerned about enough bracing under this thing. I've heard the plastic can bulge under the weight. Can't let that happen....
    The print washer will go on a separate square table I think. I'm even thinking about building a box with a drain in it in case it leaks !

    Delta Drain Faucet Set by Nokton48, on Flickr

    This is the Delta Faucet/Drain set that will restore my new sink. B&H sells it for $119 which is OK with me at this point.
    There was one on my new unit but it was completely rotten. Might as well replace all with new.

    When you total everything up at the Lowes or Home Depot it's prolly cheaper to buy this from B&H! And it's made for this sink.
    Flikr Photos Here: https://www.flickr.com/photos/18134483@N04/

    “The secret of getting ahead is getting started.”
    ― Mark Twain

  4. #34

    Join Date
    Jan 2013
    Location
    Madisonville, LA
    Posts
    2,412

    Re: Darkroom Renovation Phase 1

    I had a SS tray custom made to fit under my Zone VI washer just in case................It's outside the sink on a cabinet next to the sink and drains to the sink.

    Click image for larger version. 

Name:	IMG_0195.jpg 
Views:	69 
Size:	45.0 KB 
ID:	188673

  5. #35

    Re: Darkroom Renovation Phase 1

    Work is proceeding at a good clip. We are about half done installing the new drop ceiling. I'm getting very confident with the vintage Mitre Saw on the new Harbor Freight saw stand. Making lots of sawdust and vacuuming it up right away. :smile:
    Flikr Photos Here: https://www.flickr.com/photos/18134483@N04/

    “The secret of getting ahead is getting started.”
    ― Mark Twain

  6. #36

    Re: Darkroom Renovation Phase 1

    Plans Matte Print Dryer by Nokton48, on Flickr

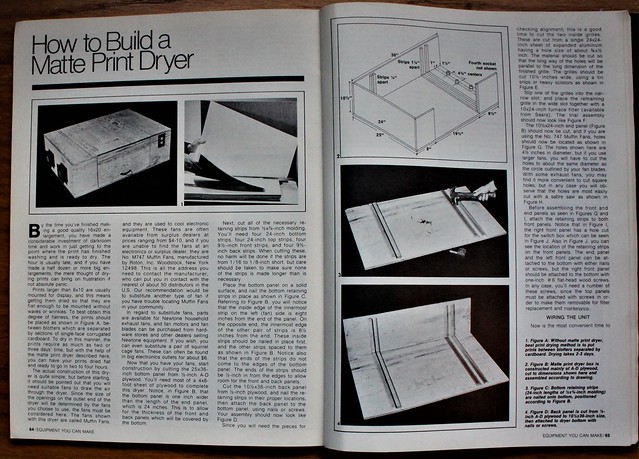
    Here's the Petersons Photographic article from the 70s, that I've been thinking about. I have fresh blotter sheets from Freestyle (25 of them 20x24), and I've ordered corrugated cardboard sheets same size (a carton of them), which will dry a pile of 16x20s in a couple of days time. By building this matte print dryer, it would speed up the drying process to just a few hours.

    Build Dry Mount Press by Nokton48, on Flickr

    There's this, too.................
    Last edited by Daniel Unkefer; 25-Mar-2019 at 17:46.
    Flikr Photos Here: https://www.flickr.com/photos/18134483@N04/

    “The secret of getting ahead is getting started.”
    ― Mark Twain

  7. #37

    Re: Darkroom Renovation Phase 1

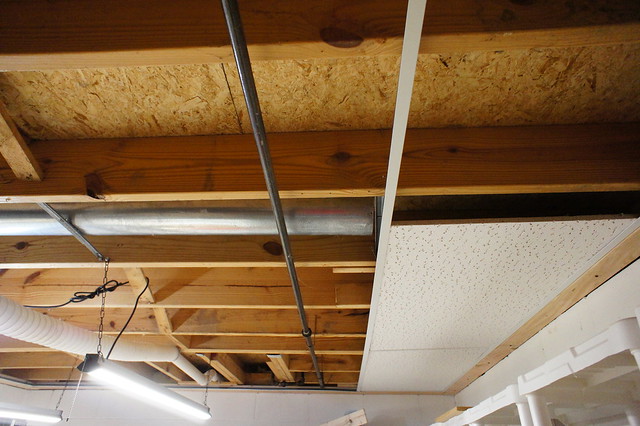
    Here you can see the drop ceiling starting to go in. You can see the 2x4's we ran around the perimeter above the concrete block walls. We need to rearrange some ductwork; will finish that hurdle on Monday. The gas pipe will run below the drop ceiling; don't want to mess with it, and if we ever decide to sell the house (which I seriously doubt!!), want to have it still hooked up (used to have a gas fireplace and it could be easily hooked back up). In the near right corner ducting will hang down, then go up into the drop ceiling. Easiest way to deal with it. Also this plan preserves the extra tall ceiling height.


    I am pleased so far! When we finish the ceiling the real photo fun will begin.

    Darkroom Drop Ceiling by Nokton48, on Flickr
    Flikr Photos Here: https://www.flickr.com/photos/18134483@N04/

    “The secret of getting ahead is getting started.”
    ― Mark Twain

  8. #38

    Re: Darkroom Renovation Phase 1

    Drop Ceiling about half done by Nokton48, on Flickr

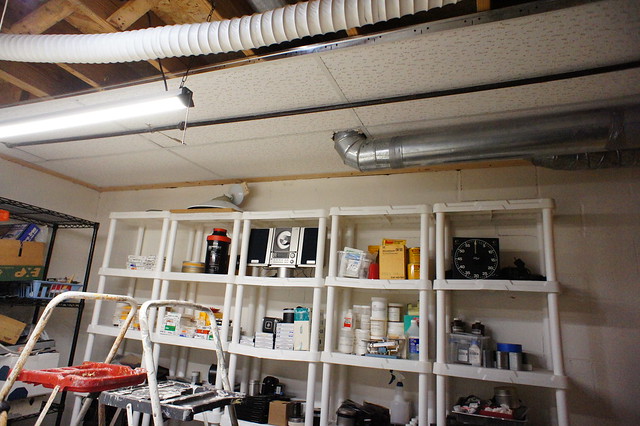
    Today's progress, the drop ceiling is about half done! The difficult part of the work is over. Rerouting ducts, cutting around disconnected gas pipes, and various interesting construction roadblocks. The other half will be easy-peasy, and go quickly! Then on to installing the sinks, new electricals, and plumbing. Much more fun and interesting than this part of it. But WOW I'm glad I went for the drop ceiling. Really finishes the space!

    I hope to have EVERYTHING completed by middle of spring.
    Flikr Photos Here: https://www.flickr.com/photos/18134483@N04/

    “The secret of getting ahead is getting started.”
    ― Mark Twain

  9. #39
    Drew Wiley
    Join Date
    Sep 2008
    Location
    SF Bay area, CA
    Posts
    18,385

    Re: Darkroom Renovation Phase 1

    I love it, "How to Build your own Drymount Press". People used to give me all kinds of old do-it-yourself magazines going back even to the 20's. "How to drill your own water well using your drill' - where you could order a bunch of 12 ft long bits for your 1940's 1/4" electric drill. Secret formulas for turning pine wood into oak. I always expected to see a Popular Mechanics article come out which told you how to build a nuke submarine using old washing machine parts. Drug smuggler subs come pretty close, except they're diesel. What I did see was a series of articles in a woodworking magazine describing how to build your own wood lathe. I presume the second installment showed the first project to do with it: use your lathe to make a prosthetic arm to replace your real arm torn off by gettting it caught in your home-made lathe. But is that really a drymount press or a giant electric bug-popper/ combination human-popper? Looks like something the Inquisition could have used.

  10. #40

    Re: Darkroom Renovation Phase 1

    This dry mount press project is now off the table. I've been told by a helpful expert that there are several different ways this unit could shock the crap out of you!

    I'll find a commercially made dry mount press. Want to find something close to where I live. 43068 zip.
    Last edited by Daniel Unkefer; 27-Mar-2019 at 05:56.
    Flikr Photos Here: https://www.flickr.com/photos/18134483@N04/

    “The secret of getting ahead is getting started.”
    ― Mark Twain

Similar Threads

  1. Bellows renovation to do or not? (NOT LEATHER)
    By wood & Brass in forum LF DIY (Do It Yourself)
    Replies: 16
    Last Post: 17-Jul-2017, 08:37
  2. Phase One P45
    By sherry in forum Cameras & Camera Accessories
    Replies: 1
    Last Post: 24-May-2008, 15:11

Bookmarks

Posting Permissions

  • You may not post new threads
  • You may not post replies
  • You may not post attachments
  • You may not edit your posts
  •