Page 5 of 23 FirstFirst ... 3456715 ... LastLast
Results 41 to 50 of 227

Thread: Darkroom Renovation Phase 1

  1. #41

    Join Date
    Dec 2014
    Location
    Iowa City, Iowa
    Posts
    1,709

    Re: Darkroom Renovation Phase 1

    Quote Originally Posted by Drew Wiley View Post
    I love it, "How to Build your own Drymount Press". People used to give me all kinds of old do-it-yourself magazines going back even to the 20's. "How to drill your own water well using your drill' - where you could order a bunch of 12 ft long bits for your 1940's 1/4" electric drill. Secret formulas for turning pine wood into oak. I always expected to see a Popular Mechanics article come out which told you how to build a nuke submarine using old washing machine parts. Drug smuggler subs come pretty close, except they're diesel. What I did see was a series of articles in a woodworking magazine describing how to build your own wood lathe. I presume the second installment showed the first project to do with it: use your lathe to make a prosthetic arm to replace your real arm torn off by gettting it caught in your home-made lathe. But is that really a drymount press or a giant electric bug-popper/ combination human-popper? Looks like something the Inquisition could have used.
    I have a compilation book of the Popular Mechanics photo projects. Some of the stuff is really funny. I'm convinced that most of the stuff was quasi fiction. Most everything was a drawing and a list of parts. Still it's one of my favorite photography books. The tray rocker with a non grounded motor off a wringer washer etc. I have a neat little cabinet my Dad made from a DIY photo project. I remember he kept his developing tank, thermometer, sundries. It has 4 shelves that are designed to hold 8x10 packages of paper. Grades 1 to 4. He always used DW Kodak Medalist and Microdol-X.

  2. #42

    Join Date
    Feb 2013
    Posts
    335

    Re: Darkroom Renovation Phase 1

    Quote Originally Posted by Daniel Unkefer View Post
    This dry mount press project is now off the table. I've been told by a helpful expert that there are several different ways this unit could shock the crap out of you!

    I'll find a commercially made dry mount press. Want to find something close to where I live. 43068 zip.
    Good...I was afraid we'd hear months down the line that it'd shorted or something and killed you !

  3. #43

    Join Date
    Feb 2013
    Posts
    335

    Re: Darkroom Renovation Phase 1

    Hey Dan...an off the wall idea for you. Shops that make T-shirts with thermal lettering use a heated press much like a dry mounting press. They come in sizes up to 16 by 20. Maybe look for a used one or one off Ebay?

  4. #44

    Join Date
    Jun 2001
    Location
    North of Chicago
    Posts
    1,758

    Re: Darkroom Renovation Phase 1

    If you leave out all the electrical bits and the concrete the Pop Mechanics press would flatten prints nicely. As shown it's basically a heated book press which bookbinders have been using since forever. Put them in there under a little pressure, go to bed and wake up to flat photos. You however would need another solution if you want to actually dry mount.
    ____________________________________________

    Richard Wasserman

    https://www.rwasserman.com/

  5. #45

    Join Date
    Feb 2010
    Posts
    1,136

    Re: Darkroom Renovation Phase 1

    Agreed on not building a dry-mount press. They are not too hard to find, I got a nice one for < $100 locally, a while back. (I have still yet to actually use it...LOL)

    For print drying, I'd probably do something with screens rather than blotters.

  6. #46

    Re: Darkroom Renovation Phase 1

    I'm going to be making a big pile of 20x24 screens
    And blotters have always worked very well for me. Just takes a few days to air dry.

    Our local camera show is coming up. Three or four club members have closed out their darkrooms..........
    Flikr Photos Here: https://www.flickr.com/photos/18134483@N04/

    “The secret of getting ahead is getting started.”
    ― Mark Twain

  7. #47
    Eric Woodbury
    Join Date
    Dec 2003
    Posts
    1,641

    Re: Darkroom Renovation Phase 1

    I hang my prints to dry the same way and same place as my negatives. They're a little curly, but fiber is always that way and the dry mount press fixes that.

    Originally I had screens, but I needed the space. Plus sometimes I could see the screen pattern on my prints. Not good.

  8. #48

    Join Date
    Feb 2010
    Posts
    1,136

    Re: Darkroom Renovation Phase 1

    I always dried face-up on screens, to avoid any chance of the pattern.

  9. #49

    Re: Darkroom Renovation Phase 1

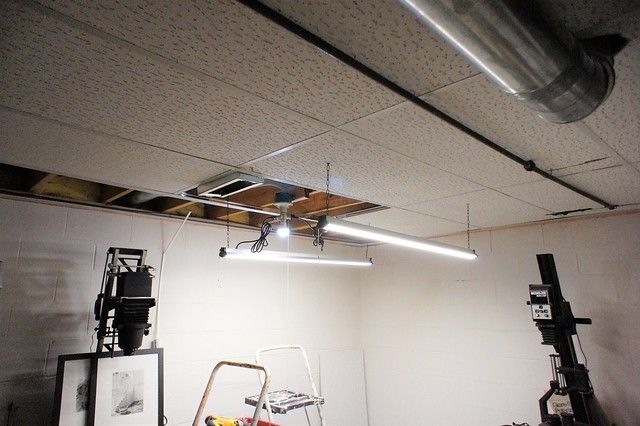
    Drop Ceiling Getting There 1 by Nokton48, on Flickr

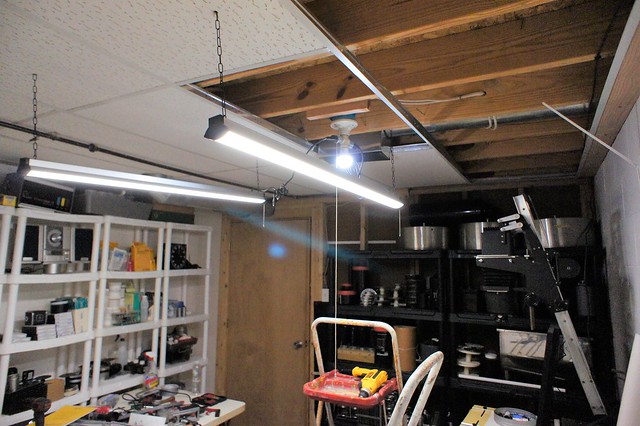
    Drop Ceiling Getting There 2 by Nokton48, on Flickr

    As you can see, we are making progress with the drop ceiling. Note the new heat duct in the ceiling, and we relocated the overhead light so now it fits into the drop ceiling. Also the black wire shelving is gone (and all the construction stuff that was on it!), which makes a lot more room for everything darkroom related.

    I think I will need to finish the wall to the right of the door, there is room to spare to put the six foot long Delta darkroom sink there. Electricals already in there (to a point), water lines already run just on the other side of the same wall, also the Kreonite Water Board is right there, just needs to be flipped into the new work space. And the Kreonite CPT16 drain line is right there too. I think this is the easiest way to get the new long sink up and running. Next to the new sink on the white concrete wall will go the 4x4 foot Kreonite Plate Washing Sink, and the Calumet 16x20 Archival Print Washer.

    Plenty to consider this weekend. Start again on Monday.

    Between now and Monday I need to decide where I want everything to go (equipment placement), including the electricals. Lots of cleaning and planning between now and then.
    Last edited by Daniel Unkefer; 30-Mar-2019 at 06:25.
    Flikr Photos Here: https://www.flickr.com/photos/18134483@N04/

    “The secret of getting ahead is getting started.”
    ― Mark Twain

  10. #50

    Re: Darkroom Renovation Phase 1

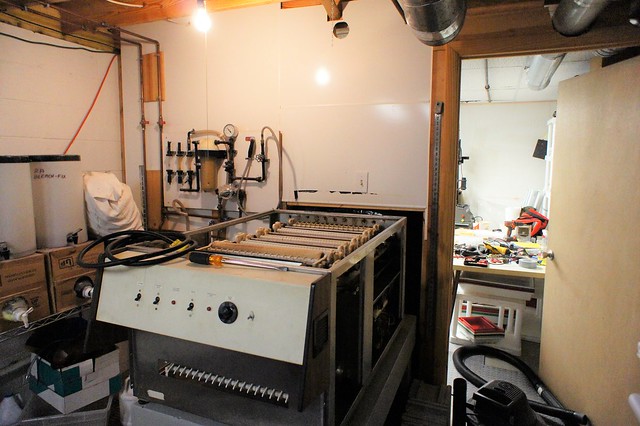
    The Kreonite CPT16 color paper processor is in the process being stripped down, as it warms up, it will go into the garage. It has been sold, so that that will give me some extra operating funds.

    You can see the water lines upper left and the Kreonite Water Board right there.

    Kreonite CPT16 Stripdown Removal Water Board Flipped by Nokton48, on Flickr
    Last edited by Daniel Unkefer; 30-Mar-2019 at 12:53.
    Flikr Photos Here: https://www.flickr.com/photos/18134483@N04/

    “The secret of getting ahead is getting started.”
    ― Mark Twain

Similar Threads

  1. Bellows renovation to do or not? (NOT LEATHER)
    By wood & Brass in forum LF DIY (Do It Yourself)
    Replies: 16
    Last Post: 17-Jul-2017, 08:37
  2. Phase One P45
    By sherry in forum Cameras & Camera Accessories
    Replies: 1
    Last Post: 24-May-2008, 15:11

Bookmarks

Posting Permissions

  • You may not post new threads
  • You may not post replies
  • You may not post attachments
  • You may not edit your posts
  •