


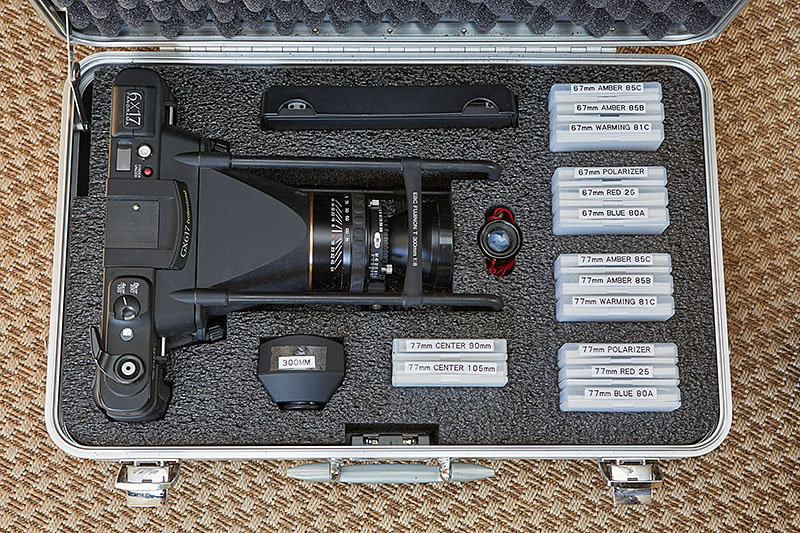
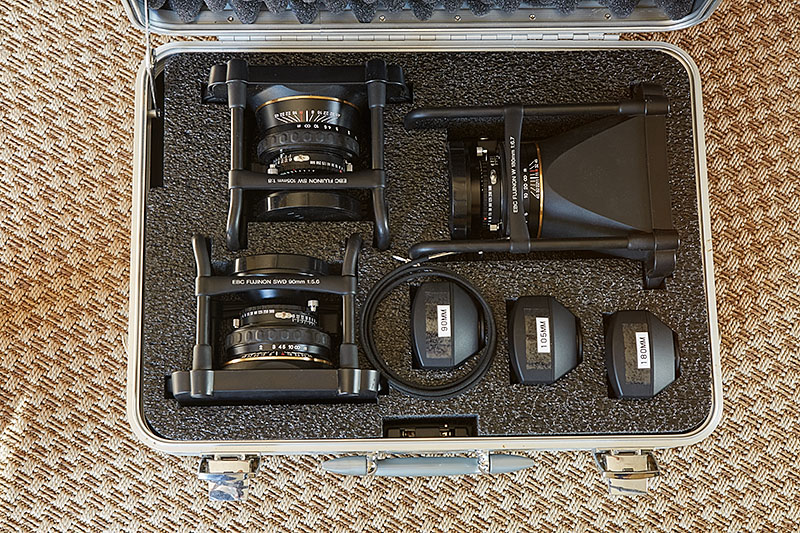
Today Im going to review my experience creating new foam inserts for two Halliburton Zero cases that I use for a Fuji GX-617 camera. I used a company called My Case Builder, and the entire process took about two months, which is crazy when you think about it. However, when you break down all steps involved, its somewhat justifiable, or at least understandable. My hope is to inform others who are thinking about doing something similar, and perhaps help you in the process.
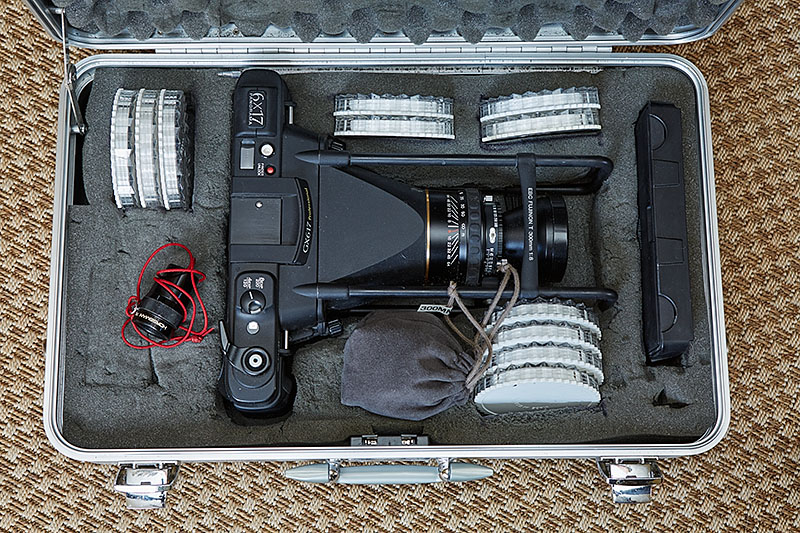
I started this project because my current foam was disintegrating. In fact, after ten years of use, it was so bad that minute particles were getting all over the camera. I was afraid that they would work into the camera and lenses, and then Id have a bigger problem on my hands. This is what the two cases looked like before I started.
The process began in late November. After creating an online account at www.mycasebuilder.com, I navigated through their web application. First off, my two Halliburton cases were not available on their site. Furthermore, the camera and lenses were not in their library of shapes. Therefore, MyCaseBuilder offered two ways to create custom shapes. The first is with an online application they call Photo Tracer. This allows you to upload a photo that you then trace with their application. The second way is to define simple shapes of squares, circles, or polygons. These can be placed in combination to create more complex shapes.
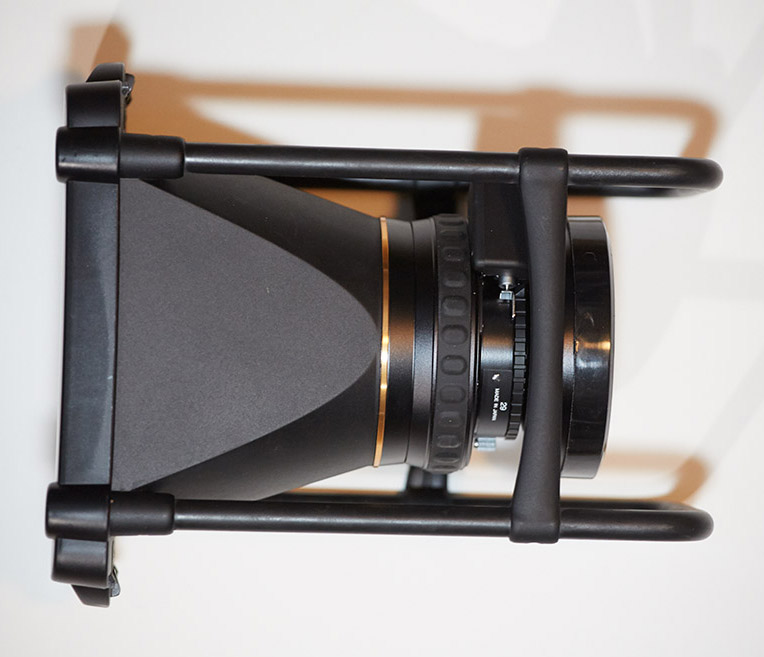
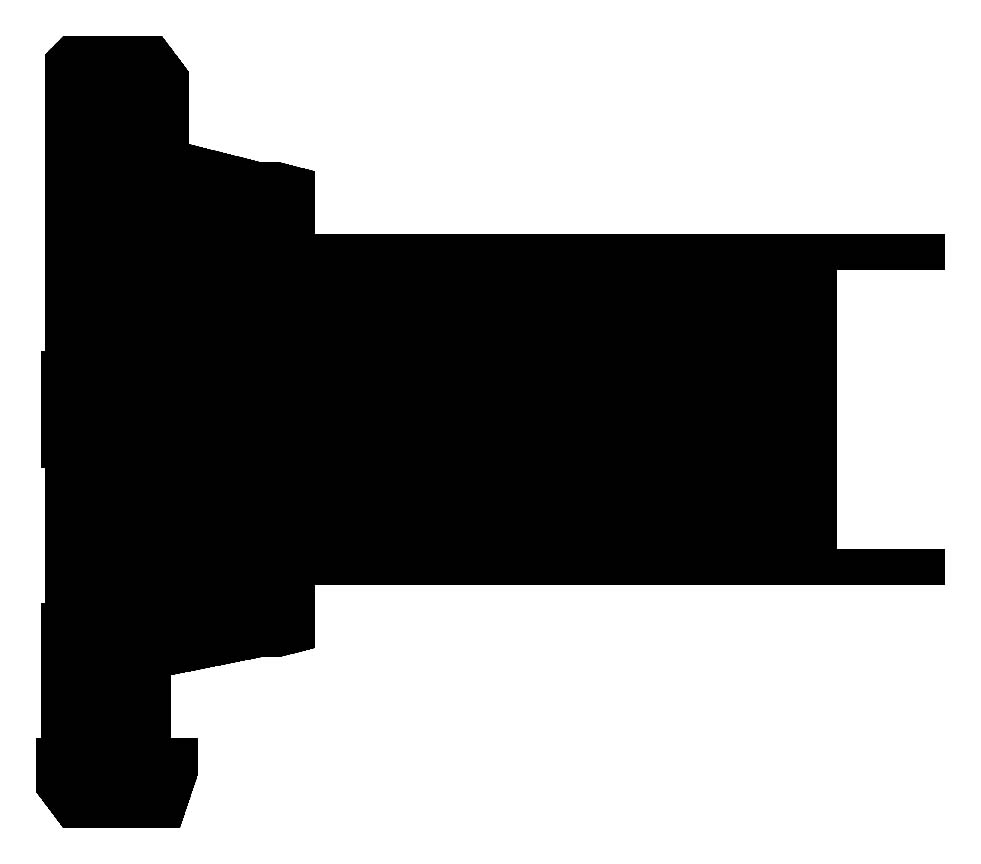
My initial attempt to create shapes was with their Photo Tracer application. I took some quick snapshots of the camera and lens, uploaded them to their application and proceeded to trace. I quickly discovered that this wasnt accurate enough for me. The main problem that I couldnt wrap my brain around was with parallax error. Take a look at the following image. Youll notice that the top and bottom protective arms that surround the lens element are not in alignment with each other. I attempted to take additional images with a longer lens and further my shooting distance, but it still wasnt accurate enough for me. When the image is uploaded to MyCaseBuilder, the Photo Tracer works by following hard contrast lines. My trouble and concern was that the width of the slots for the protective arms was not going to be accurate enough. In hindsight, I feel that I may have been over-reacting a bit and perhaps too myopic. At any rate, I gave up and concluded that that process wasnt working for me.
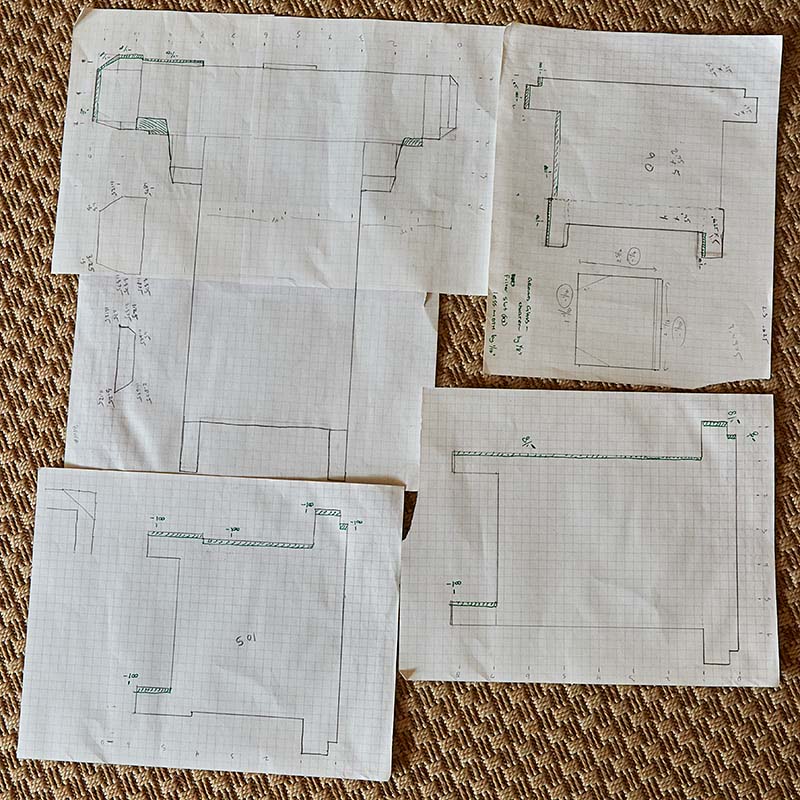
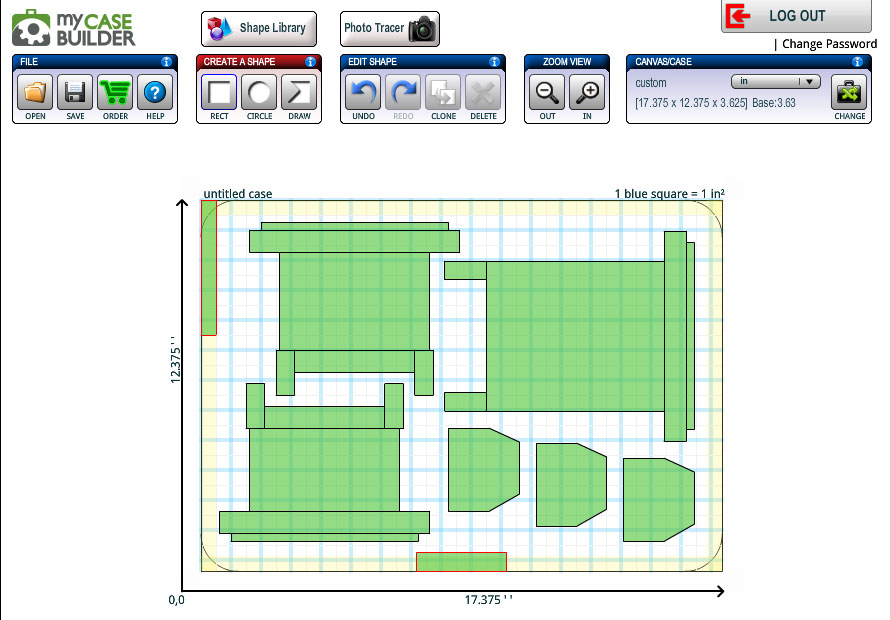
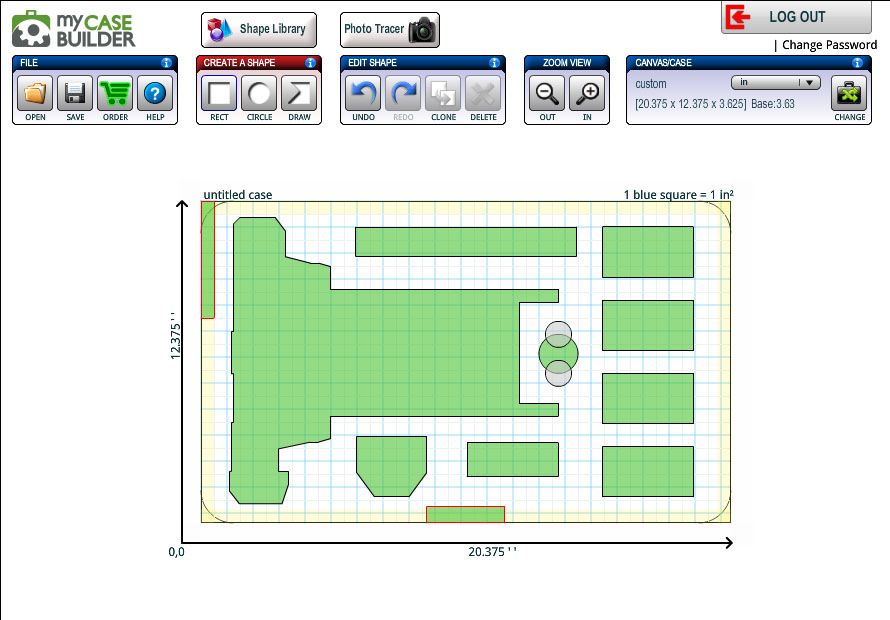
I decided to use the alternate method of adding individual shapes to their layout. Wow! I didnt know what I was in for, because this was very laborious. I began by using graph paper and a right-angle ruler. I transferred the physical dimensions to the paper.
continued...


 Reply With Quote
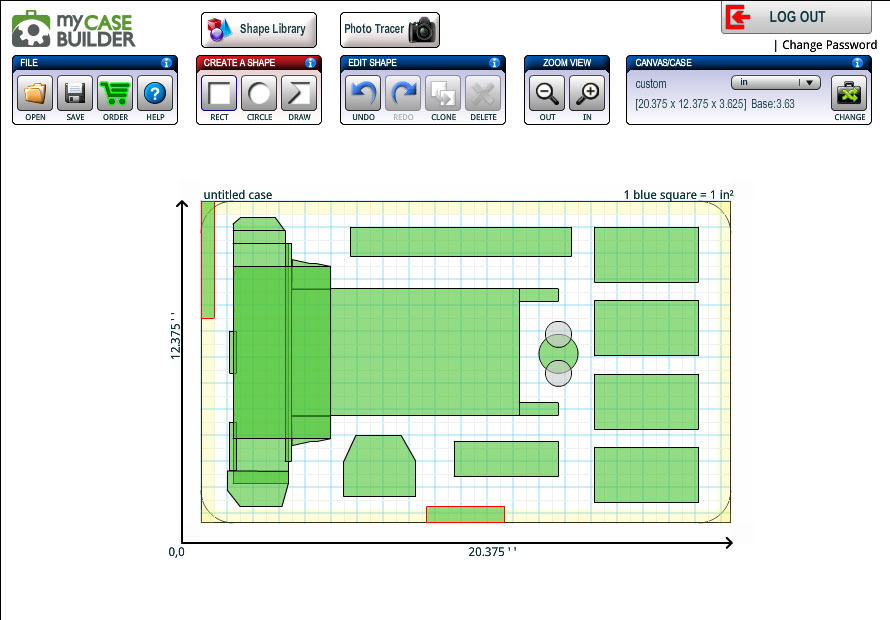


Bookmarks