Page 16 of 22 FirstFirst ... 61415161718 ... LastLast
Results 151 to 160 of 219

Thread: DSLR Scanner: Light Sources

  1. #151
    Peter De Smidt's Avatar
    Join Date
    Jan 2001
    Location
    Fond du Lac, WI, USA
    Posts
    8,972

    Re: DSLR Scanner: Light Sources

    Yeah, that's a great idea for use with a fixed light source.
    “You often feel tired, not because you've done too much, but because you've done too little of what sparks a light in you.”
    ― Alexander Den Heijer, Nothing You Don't Already Know

  2. #152
    Bert Pohl madumi's Avatar
    Join Date
    Feb 2015
    Location
    Upstate New York
    Posts
    13

    DSLR Scanner: Light Sources - experimentation #1

    Here's the results of the experimentation I went through to obtain an evenly illuminated light source... I'll break it into separate posts as there's a limit of 4 pics per post...


    Attempt #1 - styrofoam box with a 45 degree reflecting bend

    Click image for larger version. 

Name:	styrofoam-setup.jpg 
Views:	48 
Size:	53.0 KB 
ID:	129115

    I took the time to adjust the angle of the reflecting bend so that the intensity of the reflected light beam aimed for the center of the final opaque light source. Having said that, the results were the worst for edge darkness. I tried lining the outside of the styrofoam box with aluminum foil, which didn't seem to help. I also tried using diffuse light before it entered the box (which made no difference).

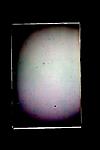
    Please excuse the drill holes in the opaque acrylic. It was the only piece i had on hand at the time (overlapping the internal dimensions of the box). Here's an unedited capture of the light source:

    Dimensions of the internal styrofoam tube are 18cm x 12cm
    Click image for larger version. 

Name:	styrofoam.jpg 
Views:	45 
Size:	11.5 KB 
ID:	129116

    And Here's the same light source with the levels crushed to within 10 RGB values:

    Click image for larger version. 

Name:	styrofoam-levels.jpg 
Views:	47 
Size:	13.5 KB 
ID:	129117

  3. #153
    Bert Pohl madumi's Avatar
    Join Date
    Feb 2015
    Location
    Upstate New York
    Posts
    13

    DSLR Scanner: Light Sources - experimentation #2

    Attempt #2 - mirror box with prismatic acrylic sheets

    I put together a box using 98% reflectivity aluminum. My thought was that the internal reflections would create a perceptually wider light source. Here's the box:

    Click image for larger version. 

Name:	mirror-box-setup2.jpg 
Views:	51 
Size:	90.7 KB 
ID:	129119

    Here's the view inside the box:

    Click image for larger version. 

Name:	mirror-box-setup.jpg 
Views:	42 
Size:	121.8 KB 
ID:	129120

    This attempt was probably about equally unsuccessful... Try as I did, I could not eliminate a distinctive hot spot in the middle of the acrylic. I tried an additional layer of prismatic acrylic in the middle of the tube, but it had little discernible benefit. For what it's worth also, the 98% reflectivity aluminum also seems to reflect colors better from the red end of the spectrum, so there's a slight tinge to the color spectrum.

    Here's an unedited capture of the resultant light source.
    Dimensions are 18cm x 12cm

    Click image for larger version. 

Name:	mirror-box.jpg 
Views:	35 
Size:	9.9 KB 
ID:	129121

    And here's the same capture with the levels crushed to within 10 RGB values

    Click image for larger version. 

Name:	mirror-box-levels.jpg 
Views:	35 
Size:	26.6 KB 
ID:	129122

  4. #154
    Bert Pohl madumi's Avatar
    Join Date
    Feb 2015
    Location
    Upstate New York
    Posts
    13

    DSLR Scanner: Light Sources - experimentation #3

    Attempt #3 - Acrylic sheet set over a masked beauty dish

    This seems to hit a sweet spot.
    Here's a pic of the masked beauty dish. The mask has a diameter of 21.5cm & the beauty dish is 70cm dia.

    Click image for larger version. 

Name:	beauty-dish-masked.jpg 
Views:	29 
Size:	30.0 KB 
ID:	129123

    Here's a side view of the setup:

    Click image for larger version. 

Name:	beauty-dish-setup.jpg 
Views:	42 
Size:	45.9 KB 
ID:	129124

    By varying the distance between the masked beauty dish and the acrylic, the shadow it casts can be increased (by reducing the distance), or decreased (by increasing the distance).

    Here's a pic of an unedited capture of the light source
    Dimensions are 30cm x 30cm

    Click image for larger version. 

Name:	masked-beauty-dish-dispersion.jpg 
Views:	36 
Size:	9.8 KB 
ID:	129125

    And here's the same capture with the levels brought to within 10 RGB values:

    Click image for larger version. 

Name:	masked-beauty-dish-dispersion-levels.jpg 
Views:	37 
Size:	34.2 KB 
ID:	129126

    This was definitely the most satisfactory setup. If you blur the unedited capture (there should be some bokeh involved in DSL capture anyway), the RGB values are within 1 of 255 values -- very acceptable, and it would not be hard to tweak the setup (I did not bother as I figured I would do that with the final design).

    The edge darkness in the acrylic is due entirely to the sides receiving no light cast on it. This could be fixed with bevelling the acrylic or maybe introducing a white reflector to surround the setup. I feel confident that the unevenness in the light source could virtually be eliminated, possible with a larger mask on the beauty dish, possibly with an opaque mask or by playing with the distance--there's many options for tweaking

  5. #155
    Bert Pohl madumi's Avatar
    Join Date
    Feb 2015
    Location
    Upstate New York
    Posts
    13

    addenda

    Last of all, mainly to satisfy my curiosity, I tried narrowing the diameter of the beauty dish by cutting a mask for the outside (32cm diameter) like this:

    Click image for larger version. 

Name:	beauty-dish-double-masked.jpg 
Views:	38 
Size:	40.4 KB 
ID:	129127

    Then I re-ran the tests I had done with the larger diameter beauty dish... The result was that overall evenness of the illumination suffered. I tried several times, but the overall setup proved much more finicky, and definitely not worth the time...

  6. #156
    Tin Can's Avatar
    Join Date
    Dec 2011
    Posts
    22,494

    Re: addenda

    Quote Originally Posted by madumi View Post
    Last of all, mainly to satisfy my curiosity, I tried narrowing the diameter of the beauty dish by cutting a mask for the outside like this:

    Click image for larger version. 

Name:	beauty-dish-double-masked.jpg 
Views:	38 
Size:	40.4 KB 
ID:	129127

    Then I re-ran the tests I had done with the larger diameter beauty dish... The result was that overall evenness of the illumination suffered. I tried several times, but the overall setup proved much more finicky, and definitely not worth the time...
    Thanks for showing your results. Good work.

    The 90 degree styro box has never made sense to me, it must have been driven by marketing people who demanded heads for low ceilings.

    All very interesting!
    Tin Can

  7. #157
    Tin Can's Avatar
    Join Date
    Dec 2011
    Posts
    22,494

    Re: DSLR Scanner: Light Sources

    Quote Originally Posted by Zndrson View Post
    Hi all,

    Though I have not read through every post in this thread, I did want to offer my solution for correcting evenness issues using a light box/other light source.

    In Capture One, there is a little known tool used mostly by Technical Camera photographers with digital backs called the Lens Cast Correction tool (LCC).

    Used properly, a calibrated piece of translucent plexiglass is placed directly in front of the lens of the Technical Camera. An exposure is taken for middle grey, or slightly under.


    The resulting image shows all of the lenses faults (vignetting, color cast, etc.). When an LCC is created in Capture One and applied to that same image, the software corrects for all of the faults. Those adjustments can then be applied directly to images taken using that camera/digital back combination so that the image is correct from the beginning.

    I use this same technique when scanning with my D800, though the piece of plexi is replaced with the light table. I take an image of the light table first, and create an LCC in Capture One from that image. Then I'll photograph the negative, and apply that LCC to the image of the negative.

    The benefits are obvious, and provides me with piece of mind. The software works very well, especially with subtle gradation changes. It can't work magic and make black to medium grey without significant noise, but as long as you get pretty close, the LCC application will do the rest of the work for you.

    Hope this helps someone. Sorry of everyone knows about this tool already and is already implementing it in their workflow!
    Great info. I wonder if there is way to do this with PS. I also wonder if a 'dust off' Nikon shot would work. I am not that handy with these procedures. Nor do I want to buy Capture 1. I spent enough with Adobe CC and my D750.

    And no, I don't think all of us know much about this.

    Thanks for sharing!
    Tin Can

  8. #158

    Join Date
    May 2006
    Location
    Berkeley, CA USA
    Posts
    208

    Re: DSLR Scanner: Light Sources

    Good stuff, Bert. Thanks for sharing your results.

    My suggestion, and it's admittedly a shot in the dark, would be to get the best uniformity you can and lock it down. Then make an image of the light source at the intended brightness and invert it, then print that on transparency meant for overhead projectors, and secure it to the diffuser. With some trial and error that could effectively negate any residual unevenness.

    Are you designing this to be a non stitching platform? Single capture of larger formats? Please let us know what your approach is.

  9. #159

    Join Date
    Mar 2012
    Location
    Norway
    Posts
    55

    Re: DSLR Scanner: Light Sources

    Hi There!

    I always had the best result from building a integrating sphere with leds as lightsource. What you need is a sphere with a diffuse interior. The hole should only be 5-10% of the surface area so you need quite a big one for 1:1 . The smaller tiles obviously needs a smaller backlight if the light is static with the camera and the neg moving and so the sphere can be smaller. I have used several 1-3 watt leds and it works very nice. Its best to flash them only during exposure I find since that means I can get away with smaller heatsinks. Here is a picture of a commercial one http://goo.gl/lS2wdI . Its easy to build, you need to find a sphere at the right size and right material, then split it in two and paint it with the mattest whitest paint you can find. Make a hole for the camera and a hole or several for the light(s). Then put it back together. If you find one with a nice white matte interior that works well you can of course skip the splitting with is nice.

    http://s12.photobucket.com/user/barr...here6.jpg.html
    http://s12.photobucket.com/user/barr...here1.jpg.html

  10. #160

    Join Date
    May 2008
    Location
    El Cajon, CA
    Posts
    674

    Re: DSLR Scanner: Light Sources

    Quote Originally Posted by Zndrson View Post
    Hi all,

    Though I have not read through every post in this thread, I did want to offer my solution for correcting evenness issues using a light box/other light source.

    In Capture One, there is a little known tool used mostly by Technical Camera photographers with digital backs called the Lens Cast Correction tool (LCC).

    Used properly, a calibrated piece of translucent plexiglass is placed directly in front of the lens of the Technical Camera. An exposure is taken for middle grey, or slightly under.


    The resulting image shows all of the lenses faults (vignetting, color cast, etc.). When an LCC is created in Capture One and applied to that same image, the software corrects for all of the faults. Those adjustments can then be applied directly to images taken using that camera/digital back combination so that the image is correct from the beginning.

    I use this same technique when scanning with my D800, though the piece of plexi is replaced with the light table. I take an image of the light table first, and create an LCC in Capture One from that image. Then I'll photograph the negative, and apply that LCC to the image of the negative.

    The benefits are obvious, and provides me with piece of mind. The software works very well, especially with subtle gradation changes. It can't work magic and make black to medium grey without significant noise, but as long as you get pretty close, the LCC application will do the rest of the work for you.

    Hope this helps someone. Sorry of everyone knows about this tool already and is already implementing it in their workflow!
    Quote Originally Posted by Randy Moe View Post
    Great info. I wonder if there is way to do this with PS. I also wonder if a 'dust off' Nikon shot would work. I am not that handy with these procedures. Nor do I want to buy Capture 1. I spent enough with Adobe CC and my D750.

    And no, I don't think all of us know much about this.

    Thanks for sharing!
    I found that I could use the clean lid from a Starbucks coffee cup and it worked well.

    m
    Michael Cienfuegos

Similar Threads

  1. Making a scanner with a DSLR
    By Frank Petronio in forum LF DIY (Do It Yourself)
    Replies: 616
    Last Post: 9-Jan-2018, 03:06
  2. VC Light Sources
    By Mark Whiting in forum Darkroom: Equipment
    Replies: 3
    Last Post: 10-Mar-2005, 19:20
  3. Light sources for focusing in low light
    By Leigh Perry in forum Style & Technique
    Replies: 3
    Last Post: 9-Sep-2004, 09:19
  4. Filters for different light sources
    By Karl Beath in forum Lenses & Lens Accessories
    Replies: 3
    Last Post: 11-Feb-2002, 15:46

Bookmarks

Posting Permissions

  • You may not post new threads
  • You may not post replies
  • You may not post attachments
  • You may not edit your posts
  •