


You often feel tired, not because you've done too much, but because you've done too little of what sparks a light in you.
― Alexander Den Heijer, Nothing You Don't Already Know

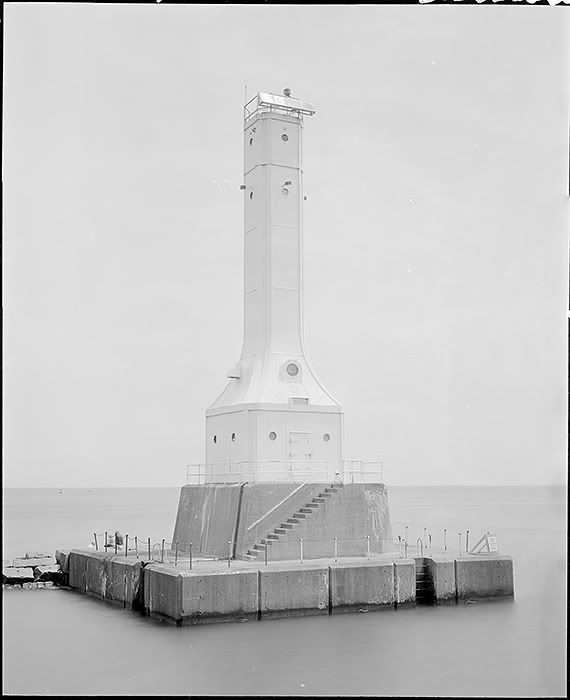
Huge improvement. That is with the new light source? I thought you were wrong about that but I think you were bang on.
Thanks,
Kirk
at age 73:
"The woods are lovely, dark and deep,
But I have promises to keep,
And miles to go before I sleep,
And miles to go before I sleep"
Well, it is with the new light source, but it's also with a different method. I manually positioned all of the pieces in Photoshop, using the difference blending mode and the arrow keys to nudge sections into place. It's about as much fun as counting the hairs on your own arm. It looked pretty good after doing that, but there were some slight, but obvious, tonal differences between the tiles. To get rid of that, I ran auto-blend-layers on the image layers. The result is pretty good, although it's an embarrassingly bad negative. I'll scan the negative, which I'm getting really sick of, tomorrow with my Cezanne, and then we can compare.
So far, it seems that the stitching programs do pretty well with negatives that have detail throughout, but they aren't ideal, or at least my use of them isn't ideal, with images with lots of low-detail areas. I'm hoping that if we can automate the negative movement precisely enough, that we can write a script to position the files in Photoshop.
You often feel tired, not because you've done too much, but because you've done too little of what sparks a light in you.
― Alexander Den Heijer, Nothing You Don't Already Know
Here's a try with Microsoft Ice's "Structured Panorama".
The repetition was probably caused by the samples not being all the same size. In particular, the second row of samples from the bottom contained about 80% of the row below it, which isn't ideal. (The size of the opening in my negative guide caused this.) I'm hoping that fixing this will solve the problem. If so, it'd be great. Ice is very fast, and it's free!
You often feel tired, not because you've done too much, but because you've done too little of what sparks a light in you.
― Alexander Den Heijer, Nothing You Don't Already Know
I see you beat me to it, Peter. I was assembled them in 5 image horizontal rows (of which the assembly of the bottom 2 rows could be automated through PS, using "reposition image" within Photomerge), and then pieced rows together. As you said, the lack of detail required manual placement for the upper portion of the image. In my opinion that's not a big deal. There still was some color and tonal inconsistency from image to image, though it was better than your first attempt with this negative...not sure of the reasoning, perhaps the RAW editor is imparting some form of minor correction on them? I assume you've completely locked down the settings so it's consistent between files.
Regardless, this all looks extremely promising to me. Thanks so much for doing this!
Here's a result of letting PTGui find what it can and aligning the sky and upper borders manually while zooming in the detail viewer. Nudging is not easy, can't use the arrow keys, yet.

All of the Raw settings were the same. The negative was developed in Pyrocat MC, a staining developer, and so color might vary a bit with density. More importantly, though, it's likely that the flash output varied in both intensity and spectrum, the latter perhaps depending on how hot the flash tube was.
You often feel tired, not because you've done too much, but because you've done too little of what sparks a light in you.
― Alexander Den Heijer, Nothing You Don't Already Know
When I did a whole exhibition following this method many times I found those issues regarding areas of low contrast boundaries and also I noticed two side effects from digital processing: huge sensibility to flare and inconsistency on Raw processing similar shots. When shooting areas that include negative borders, for instance, I guess the algorithms that rules CR processing render different responses for the whole image and if it happens to be a flat tone, maybe the next frame will be rendered darker or lighter.
Now and then, just in the middle of a row of similar background tones, a single frame turned to be cracked and the stitching functions would show weird effects, like creating sharp borders or rotating the image, importing a piece from somewhere else... and so on.
As I was determined to make my show following this route, that's why I started writing nankim marks on those critical negative areas. It helped a lot Photomerge functions and I guess it offered a solid black curve point for CR processing, allowing more even rendition frame to frame.
Of course, it means a lot more trouble, but from one of those pictures, which turned out to be 100x140cm, I already sold many copies and if I had to make them in the darkroom... wow, that would be a lot of trouble!
That's kinda what I'm afraid of-Originally Posted by Peter J. De Smidt

Luckily, I've been busy on other things, so I still haven't had any more time to devote to this project.
I think it might be useful if you need more resolution than a V700, or if you haven't got a scanner to begin with, but my initial testing pointed towards the kind of tedium you mentioned. Your results are looking good, tonally, the repeat vignettes seem to have been eliminated- and that is the most obvious noticeable defect I've come across so far.
Good to see that progress is being made; had I been left to my own devices, my lack of progress might have become terminal. My interest might have petered out... (sorry). Your perseverance is inspirational-
j
Don't they make dedicated grayscale digital cameras that have 3x the resolution and no Bayer artifacts?
 Posting Permissions


 Reply With Quote
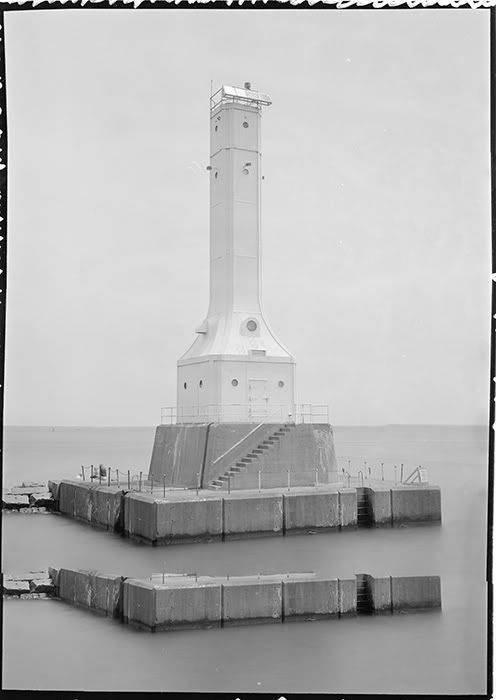
Bookmarks