Page 1 of 3 123 LastLast
Results 1 to 10 of 23

Thread: DIY Robotic Scanner Back?

Hybrid View

Previous Post Previous Post   Next Post Next Post
  1. #1

    Join Date
    Jun 2011
    Location
    Hanover, NH
    Posts
    10

    DIY Robotic Scanner Back?

    A long, tortuous story. For the past year or so I've been building robotic camera stuff using Arduino boards and inexpensive servos. You can read some of it here: http://www.maxotics.com First a thermal imager, then a robotic panorama head like the gigapan (only built from the ground up). A couple of weeks ago a friend of a friend gave me some photographic equipment to sell (from her late husband), including some (whoa this is an expensive hobby!) 4x5 equipment and lenses. I'll probably sell before my 30 days is up here, but just in case I don't I'll post in a month.

    While I'm here, I'm curious is how many people have tried to build scanning backs. The cheapest one seems to be $6,500. I think it can be done cheaper. That's coming from someone who spent thousands to build his own robotic pano head when he could have bought a gigapan for a few hundred

    I've also built some crude DOF adapters for my video camera, so I figured I'd do the same thing. Have the view camera show the image on some sort of ground glass and then raster image using a macro lens on an X/Y thing.

    If you can point me to any people/sites that have done, or are working in this area, I'd be interested. I'm also happy to answer any questions, of course.

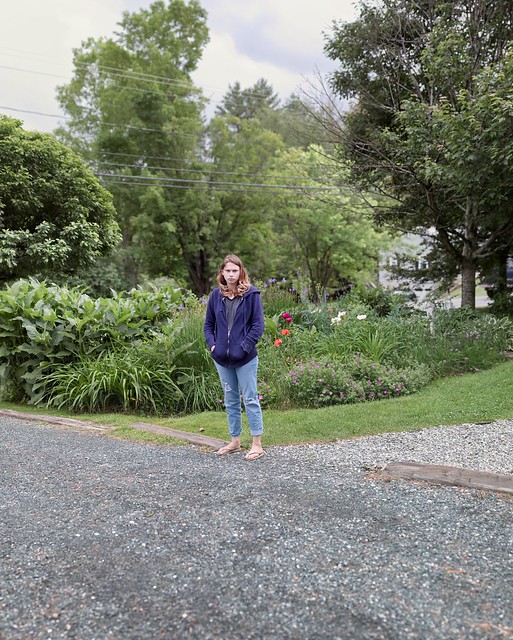
    My other somewhat related question, if you're not going to go the chemical route, why not just do stitching to get the same LF effect. For example I did this test of my daughter using 27 photos stitched together from DSLR shots.


  2. #2
    Greg Lockrey's Avatar
    Join Date
    Jun 2006
    Location
    Temperance, MI
    Posts
    1,980

    Re: DIY Robotic Scanner Back?

    How about this one: I call it my Poorman's Scanner Mod II

    I am able to get 575 mp files with this set up just moving the rear standard as I don't have mirror box issues to contend with.

    Sinar P rear standard... Studio Tool adapter and bellows.... Olympus E-P1 12 mp M4/3rds camera..... and with the Sinaron Macro 180mm f/5.6 lens

    I am able to scan very large art pieces rivaling my flat bed scanner (Epson 10,000xl) in sharpness and color fidelity.
    Greg Lockrey

    Wealth is a state of mind.
    Money is just a tool.
    Happiness is pedaling +25mph on a smooth road.


  3. #3

    Join Date
    Jun 2011
    Location
    Hanover, NH
    Posts
    10

    Re: DIY Robotic Scanner Back?

    Interesting. Are you taking images using a common nodal point (like a panorama), or are you sliding the camera top/down, left/right? I also take it you taking about 50 captures? If so, you do those all my hand?

  4. #4
    Greg Lockrey's Avatar
    Join Date
    Jun 2006
    Location
    Temperance, MI
    Posts
    1,980

    Re: DIY Robotic Scanner Back?

    Quote Originally Posted by maxr View Post
    Interesting. Are you taking images using a common nodal point (like a panorama), or are you sliding the camera top/down, left/right? I also take it you taking about 50 captures? If so, you do those all my hand?
    In this instance it is a parallel movement of the rear standard to the work (up/down- left/right). The limits of the camera rear standard allow for about 50 separate 1/2 frame 35mm images. I can double that if I move the front standard but for purposes of copying flat art work and due to using cross polarization lighting I get weird effects. So I limit the process to just the rear standard. It would be very cool to motorize that function btw.

    I did try using panoramic method (nodal point) and stitching in PS but since I use polarizers on both camera and lights it gets weird effects copying flat pieces at such a close distance. There is a "sweet" spot using cross polarized lighting and any movement off that spot shows up in the stitch I have found.
    Greg Lockrey

    Wealth is a state of mind.
    Money is just a tool.
    Happiness is pedaling +25mph on a smooth road.


  5. #5

    Join Date
    Jun 2011
    Location
    Hanover, NH
    Posts
    10

    Re: DIY Robotic Scanner Back?

    I don't understand much of the view camera terminology. What the front and back standards are, etc. I'll do some research.

    The right solution would probably use stepper motors, but I would use servos, which I'm used to, are cheap, and easy to use. What has really bedeviled me in robotic photography is gearing and tracking.

    If you were doing only left/right it would be a faily simple solution. You'd put your camera on a rail (you can use U-shape aluminum from your local hardware store and skake bearings) and a winch servo with a string that wraps between camera and motor. On a servo it's easy to send it a command and tell it to move a certain number of degrees. So on a 180 degree servo, you might find that each position is 5 degrees. So you'd program it to do 5 degrees, wait, fire the shutter (many solutions for this), etc.

    The 4x5 view camera I have (which I'm supposed to sell, but could test with) is an Osaka, mahagony 4x5. Do you have any idea if that would work. If not, in theory, could I just test with a 4x5 print? Are you focusing on a screen, or some other way?

  6. #6
    Greg Lockrey's Avatar
    Join Date
    Jun 2006
    Location
    Temperance, MI
    Posts
    1,980

    Re: DIY Robotic Scanner Back?

    The rear standard is a geared mechanism rise/fall, left/right shift, fore/aft tilt and port/starboard yaw where the film is placed and in this case the camera body. Front standard is for the lens while it has movements up/down, left/right and fore/aft etc. it is more manual. I can focus using the camera's screen in real time and it is done on the rear standard. I would imagine that a simple gearing system could replace the rise/fall knob and left/right shift thumb screw for using stepping motors. This camera is so sturdy I can easily take the 50 shots moving the standard to all positions in about a minute by hand. Your camera is a typical "field" camera and all movements are pretty much by hand. The focus is probably geared.
    Greg Lockrey

    Wealth is a state of mind.
    Money is just a tool.
    Happiness is pedaling +25mph on a smooth road.


  7. #7

    Join Date
    Jun 2011
    Location
    Hanover, NH
    Posts
    10

    Re: DIY Robotic Scanner Back?

    I'm noodling some ideas. My big question is about any image degredation by taking an image on the ground glass instead of the sensor getting directly exposed. Or put another way, how much loss of quality do you get between your method and shooting film and having that professionally scanned? Thanks!

  8. #8
    Greg Lockrey's Avatar
    Join Date
    Jun 2006
    Location
    Temperance, MI
    Posts
    1,980

    Re: DIY Robotic Scanner Back?

    The sensor is "open" to the lens anyway.... I don't get the question. I don't use a ground glass, the digital camera took it's place. As for quality to film? My clients sometimes complain that the images I make are too sharp and show too many of their imperfections on their canvasses. The only thing film has is a larger D-max compared to digital but when necessary I can use HDR imaging to make up for that short coming. I haven't had to do that in the 12 years that I been making digital copies of art work. Perhaps if I shoot a landscape scene where the lighting range is beyond the camera's sensor I would need it. I'm not that fussy in that regard.
    Greg Lockrey

    Wealth is a state of mind.
    Money is just a tool.
    Happiness is pedaling +25mph on a smooth road.


  9. #9

    Join Date
    Jun 2011
    Location
    Hanover, NH
    Posts
    10

    Re: DIY Robotic Scanner Back?

    OH! So you take the lens off the EP-1? Or never put one on NOW your photo of your setup is starting to make a lot of sense to me.

  10. #10
    Greg Lockrey's Avatar
    Join Date
    Jun 2006
    Location
    Temperance, MI
    Posts
    1,980

    Re: DIY Robotic Scanner Back?

    Quote Originally Posted by maxr View Post
    OH! So you take the lens off the EP-1? Or never put one on NOW your photo of your setup is starting to make a lot of sense to me.
    Oh YEAH.... I'm using no lens on the digital camera..... it replaces the film. But what you thought IS how those old Polaroid digital to film scanners worked. They were merely small film cameras taking an image off of a CRT screen.

    The Studio Tool kit is how to marry the camera systems. Cambo makes a camera specifically for digital cameras and there are other manufactures out there with medium format adapters etc. Studio Tool allowed Canon to Sinar or Horseman adaption and was relatively inexpensive. I used this for a long time but got an adapter to use the Olympus as there is no mirror box getting in the way. The mirror box left me to only 80 mp files. I don't think they are available any longer. The other systems are very expensive. There are cheap adapters that have sliding backs but they are primitive. Your camera could take one of those but they aren't geared movements and depending on the camera lens selection is limited to certain sizes.
    Greg Lockrey

    Wealth is a state of mind.
    Money is just a tool.
    Happiness is pedaling +25mph on a smooth road.


Similar Threads

  1. 6x9 Linhof Technika III- back?
    By Mark Sampson in forum Cameras & Camera Accessories
    Replies: 5
    Last Post: 8-Apr-2009, 07:33
  2. Arca Swiss Discovery setup
    By swmcl in forum Cameras & Camera Accessories
    Replies: 19
    Last Post: 27-Oct-2006, 07:21
  3. KBCanham 6X17 rollfilm back compatibility with other cameras?
    By John W. Randall in forum Cameras & Camera Accessories
    Replies: 7
    Last Post: 8-Sep-2004, 06:25

Bookmarks

Posting Permissions

  • You may not post new threads
  • You may not post replies
  • You may not post attachments
  • You may not edit your posts
  •