


Hello all,
I recently picked up two boxes of Harman Direct Positive Paper (from a member here) to play with in my CC-400. After a little experimentation I got to wondering if I couldn't use my 4x5 loaded with this paper to create prints of digital files I have. This is particularly interesting to me (despite its limitations) because I do not have a darkroom, and this has been my first opportunity to experiment with print making beyond the ink jet.
I devised a very simple set up that consisted of re-photographing images displayed on my TV. From adjusting this set up I was able to achieve some moderate success.
Here is what the original image looks like, and my rough target for results.
https://static1.squarespace.com/stat...-Edit-Edit.jpg
Here is the adjusted image that was used for re-photographing.
https://static1.squarespace.com/stat...stpositive.jpg
HDP paper is very contrasty, and as such I have pulled the contrast way back in this.
Here you can see the image produced from photographing the TV
(30 sec, f11, @iso 4, dev for 8min in rodinal 1+25 w/constant agitation)
Default sharpening in the TV settings led to some odd artifacts, and combined with the low resolution of standard HD, the results are certainty sub optimal. Although not the target for this test, which is to try and reach a point where original images can be faithfully reproduced, I actually quite like the tone.
Moving from using the TV to using the 15in retina display on my macbook, I saw an immediate resolution increase (duh). While before the pixels from the TV were barely visible to the naked eye in the final print, images from the macbook resulted in crisp images, with the pixels only being visible through an 8x loupe.
Here is a 100% crop comparison with the macbook on the top and the TV on the bottom
https://static1.squarespace.com/stat...ktightcrop.jpg
https://static1.squarespace.com/stat...rtraitcrop.jpg
(scanned at 4800ish dpi on Epson V-800)
For the first image using the macbook's display, I decided I wanted to try an image that was a little flatter than the portrait.
So I dug up this image out of my light room library.
https://static1.squarespace.com/stat...2/DSC01697.jpg
Here it is with my adjustments.
https://static1.squarespace.com/stat...01697+copy.jpg
Here is the result.
(10 sec, f5.6, @iso4, dev for 8min in rodinal 1+25 w/constant agitation)
There are clearly a few issues with this one. Obviously the middle of the image is over exposed. Most perplexing to me though is the heavy vignetting towards the corners, which looking back was present also on the first image but was obscured by the darkness of the background. It almost looks like a coverage issue, but I've used this lens (Caltar II-N 135 5.6 MC) before and know it covers 4x5. So far my best explanation is that perhaps it has something to do with the polarization that LCD screens use to operate, and the camera is simply too far off axis from the extremities of the area being imaged. If that is the case a longer lens to move the camera further back should be helpful, but I have yet to try that.
Continuing along I thought I'd try the portrait again, this time on my macbook.
I made some additional adjustments to bring down the contrast even more
https://static1.squarespace.com/stat...alpositive.jpg
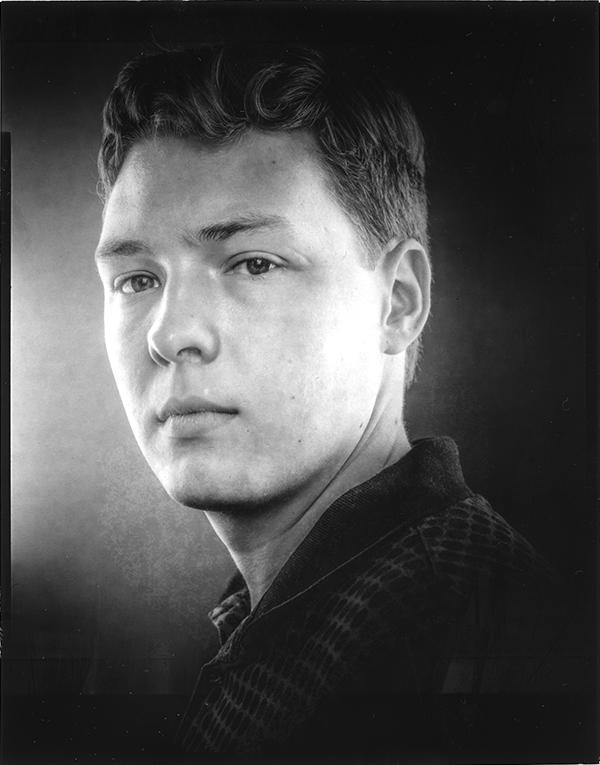
Here is the final image
While the vignetting is still present, I don't find it to be as distracting in this image. Please ignore the dirty scanner glass.
[5 sec, f5.6, @iso4, dev for 8min 30 sec in oldish D-76 w/constant agitation (Yes you can develop prints in D-76, I chose it because it is a very low contrast developer in this situation)]
I'll probably continue to fiddle with this (especially with trying to eliminate the vignetting, any ideas?) but this is where I'm at now.
-Graeme


 Reply With Quote


Bookmarks